Tuesday, December 29, 2015

Spiced almonds

Spiced almonds / Amêndoas apimentadas

The year is almost over (and I am hoping that 2016 is better than 2015, please Universe, make it happen!) so instead of writing a very long post complaining about the weather or anything else I will give you a recipe that is very quick to make, tastes great with drinks and will be a nice addition to your New Year’s Eve party – or any other party, actually. :)
I used almonds because it was what I had in my freezer, but any other nut would go well here, or even a mix of nuts.

Happy 2016!

Spiced almonds
from the always great Delicious UK

2 tablespoons olive oil
1 tablespoon Worcestershire sauce
½ teaspoon Tabasco
1 teaspoon ground cumin
1 teaspoon paprika
1 teaspoon garam masala
salt, to taste
200g almonds, or the nuts of your preference

Preheat the oven to 180°C/350°F. In a medium bowl, whisk together the oil, sauces, spices and salt. Add the nuts and turn to coat evenly. Spread mixture onto a baking sheet and bake for 10 minutes, then stir. Return to the oven for another 10 minutes or until golden brown. Stir again then tip onto kitchen paper to remove excess grease. Cool, then serve.

The nuts can be stored in an airtight container at room temperature for up to 4 days.

Serves 4

Saturday, December 26, 2015

Cheese and poppy seed bread sticks

Cheese and poppy seed bread sticks / Grissini de queijo e sementes de papoula

It has been incredibly hot here in Sao Paulo lately, so turning on the oven is a matter of courage – as much as I love baking, and I do, you know, if possible I stay away from the kitchen while the oven does all the work. And sometimes I also try to make things to nibble with a cold beer or a glass of Prosecco instead of actually cooking – I feel like a complete loser in the summer, for the heat takes away my energy and my will of doing anything whatsoever.

These bread sticks are easy to make, last a good while if kept in an airtight container and go really well with drinks, especially with dips or rolled up with slices of prosciutto – I will make them again for New Year’s Eve, but with a different type of cheese to try new flavors (I’m thinking something sharp like feta or pecorino).

Cheese and poppy seed bread sticks
slightly adapted from Delicious Australia

250g all purpose plain flour
1 teaspoon dried instant yeast
60g strong cheddar, finely grated
2/3 cup (160ml) lukewarm water
½ teaspoon salt
3 teaspoons poppy seeds
25g unsalted butter, melted

Combine flour, yeast and cheese in an electric mixer fitted with a paddle attachment, then, with the motor running at low speed, gradually add the water until the dough comes together. Add the salt and 2 teaspoons of the poppy seeds, then mix for a further 2-3 minutes until well combined. Knead for 2-3 minutes – either with the machine using a dough hook or by hand – until dough is smooth and elastic. Transfer to a lightly oiled bowl, cover with plastic wrap, then set aside in a warm spot for 45 minutes or until doubled in size.

Preheat the oven to 350°F/180°C. Line 2 large baking trays with baking paper.
Knock back dough on a lightly floured surface, then divide the dough into roughly equal 24 portions. Using your hands, roll each portion into a 1cm-thin straw approximately 30cm long. Transfer to a prepared baking tray, then repeat with remaining dough. Brush the straws with the melted butter and scatter with the remaining 1 teaspoon poppy seeds. Bake the straws, switching the position of the trays halfway through cooking so they’re evenly golden, for 30 minutes or until golden and crisp. Transfer to a wire rack to cool completely, then serve.

The bread sticks can be kept in an airtight container at room temperature for up to 1 week.

Makes 24

Tuesday, December 22, 2015

Eggnog marshmallows

Eggnog marshmallows / Marshmallows de eggnog

This year’s Christmas series was not as complete as I would have liked it to be, but it was a lot of fun making it just as the previous years: my house smelling of spices, delicious baked goods cooling down over the counter… It is, indeed, my favorite time of the year, and it would not have felt complete without cookies and gingerbread cake.

I hadn’t made marshmallows in a long time, so when I saw this eggnog version I knew they would be a great addition to my sweet celebration – they turned out great, with a wonderful texture. The recipe is great and you can customize it with other flavors, or maybe making them plain vanilla for the little ones to enjoy as well.

I wish you all a Merry Christmas! Thank you for keeping me company all this year, especially during those moments I wasn’t around here much – I deeply appreciate it. xx

Eggnog marshmallows
slightly adapted from this beautiful blog

10 leaves unflavored gelatin, each cut in 4 pieces
1 cup cold water, divided use
336g (12oz) granulated sugar
1 cup light corn syrup
pinch of table salt
½ cup (60g) confectioners' sugar
½ cup (60g) cornstarch
½ teaspoon freshly grated nutmeg
½ tablespoon rum
½ teaspoon vanilla extract
vegetable oil, for brushing the pan

Place the gelatin into the bowl of a stand mixer along with ½ cup (120ml) of the water. Have the whisk attachment standing by.
In a small saucepan combine the remaining ½ cup (120ml) water, granulated sugar, corn syrup and salt. Place over medium high heat, cover and allow to cook for 3 to 4 minutes. Uncover, clip a candy thermometer onto the side of the pan and continue to cook until the mixture reaches 115°C (240°F), approximately 7-8 minutes. Once the mixture reaches this temperature, immediately remove from the heat – while the mixture cookies, prep the pan: in a small bowl, whisk together the confectioners’ sugar and corn starch. Brush a 20x30cm (8x12in) baking pan with vegetable oil and sprinkle with some of the corn starch mixture, tapping out the excess and saving the remaining mixture for the finishing steps of the recipe.

Turn the mixer on low speed and, while running, slowly pour the sugar syrup down the side of the bowl into the gelatin mixture. Once you have added all of the syrup, add in nutmeg and increase the speed to high. Continue to whip until the mixture becomes very thick and is lukewarm, 12-15 minutes. Beat in the rum and vanilla.

When ready, pour the mixture into the prepared pan spreading evenly. Dust the top with enough of the remaining sugar and cornstarch mixture to lightly cover. Reserve the rest for later. Allow the marshmallows to sit uncovered for at least 4 hours and up to overnight.
Turn the marshmallows out onto a cutting board and cut into 1-inch squares using sharp knife brushed with vegetable oil. Once cut, lightly dust all sides of each marshmallow with the remaining corn starch mixture. Store in an airtight container for up to 3 weeks.

Makes 48

Monday, December 21, 2015

Chocolate gingerbread bites

Chocolate gingerbread bites / Quadradinhos de chocolate e gingerbread

The Internet can be a great source of inspiration, I am sure you all agree with me – not only for food, obviously, but let’s focus on that now: there are so many great recipes out there it is hard to choose which one to make, but depending on what we see it gets easier to take our pick.

I saw these bars on Rebecca’s blog and immediately felt like baking them: chocolate, spices, and molasses beautifully combined. Very Christmassy, exactly what I wanted at the moment. When I wrote to her about it, she told me she’d gotten the recipe on another blog, and that person had gotten the recipe from Martha. I then remembered I’d seen the recipe on Martha’s website more than once and thought “well, Martha did not inspire me to make these, Rebecca did”. So these delicious bars, a sort of cake perfumed with spices and moist with the addition of sour cream, have become part of my repertoire of great recipes thanks to a search online – a beautiful blog inspired me to make them, and I hope my blog can inspire some of you to make them, too.

Chocolate gingerbread bites
from Rebecca's blog

¼ cup (56g/½ stick) unsalted butter, melted
¼ cup (22g) unsweetened cocoa powder + about ½ tablespoon for dusting the pan
¾ cup (105g) all purpose flour
1 ½ teaspoons ground ginger
½ teaspoon ground cinnamon
1/8 teaspoon freshly ground nutmeg
pinch of ground cloves
½ teaspoon baking soda
½ cup (88g) light brown sugar (packed)
¼ cup (60ml) unsulphured molasses
1 large egg
¼ cup (60ml) sour cream*
½ teaspoon vanilla extract
½ cup (85g) dark chocolate chips
icing sugar, for dusting

Preheat the oven to 180°C/350°F. Lightly butter a 20cm (8in) square pan, line it with foil and butter it as well. Dust it all with cocoa and tap out the excess.

In a medium bowl, whisk together the cocoa powder, flour, spices, baking soda and salt. In a separate bowl, mix together the brown sugar, butter, egg, molasses, sour cream and vanilla. Add the dry ingredients to the wet and mix until just combined. Stir in the chocolate chips and pour into the prepared pan. Smooth out the top and bake for 25-30 minutes, or until a toothpick inserted into the middle comes out clean. Cool completely in the pan over a wire rack.
Dust with icing sugar and cut into squares to serve.

* homemade sour cream: to make 1 cup of sour cream, mix 1 cup (240ml) heavy cream with 2-3 teaspoons lemon juice in a bowl. Whisk until it starts to thicken. Cover with plastic wrap and leave at room temperature for 1 hour or until thicker (I usually leave mine on the counter overnight – except on very warm nights – and it turns out thick and silky in the following morning; refrigerate for a creamier texture)

Makes 16

Sunday, December 20, 2015

Eggnog biscotti

Eggnog biscotti / Biscotti de eggnog

It might have taken me a while to get started with the Christmas series, but once I did I was perfuming my house with spices for hours on end – my husband took a look at the kitchen counter and said: “wow, you are really inspired!” :)

These biscotti are super simple to make and might even receive other flavors if you are not that crazy for nutmeg, maybe some citrus zest? I guess they would be amazing with orange and Cointreau, for instance. The original recipe called for eggnog in the glaze, so I adapted it a little to avoid using raw eggs in the biscotti.

Eggnog biscotti
slightly adapted from here

Biscotti:
2 cups (280g) all purpose flour
1 ½ teaspoons baking powder
¼ teaspoon salt
6 tablespoons (85g) unsalted butter, room temperature
⅔ cup (133g) granulated sugar
1 teaspoon vanilla
1 teaspoon rum
½ teaspoon freshly grated nutmeg
2 eggs

For the glaze:
2 tablespoons (28g) unsalted butter, softened
1 cup (120g) icing sugar
generous pinch freshly grated nutmeg
about 1 tablespoon whole milk

Preheat oven to 180°C/350°F. Line a large baking sheet with baking paper.

Biscotti: in a medium bowl, whisk together flour, baking powder and salt. Set aside.
Using an electric mixer, beat butter and sugar until light and creamy. Beat in vanilla, rum and nutmeg. Beat in eggs one at a time. On low speed, mix in the dry ingredients and mix just until a dough forms (mine was too soft to shape, I added 1 tablespoon of flour).
Divide dough in half and shape each half in a log about 15x5cm (6x2in). Place the logs about 7.5cm (3in) apart onto prepared sheets and bake for about 25 minutes or until golden. Remove from the oven and let stand for 20 minutes – leave the oven on. Line another large baking sheet with baking paper.
Slice biscotti into little less than 2cm (¾ in) slices. Place slices onto prepared sheet and bake fo 10 minutes. Turn all slices carefully, and bake for another 10 minutes. Cool completely on baking sheet over a wire rack.

Glaze: whisk butter, sugar and nutmeg until mixture starts to get creamy. Add milk gradually, whisking until drizzable consistency. Drizzle biscotti with glaze and set aside until glaze is dry, about 20 minutes.
Biscotti can be stored in an airtight container at room temperature for up to 5 days – without the glaze they last even longer.

Makes about 25

Friday, December 18, 2015

Almond gingerbread puffs

Almond gingerbread puffs / Bolinhas de amêndoa e gingerbread

I work for a Swiss company, and some of my coworkers have discovered how much I love sweets – every now and then I get Lindt chocolates, which make my days a lot sweeter. :)

I have to say that I love getting food as gifts – I believe that food = love, and I love giving food as gifts, too, especially at this time of the year. Cookies are easy to make and to package, most people like them therefore they are the perfect present. These almond puffs taste delicious and they get more intense as days go by, especially if kept in an airtight container, but they might not last that long. :)

Almond gingerbread puffs
slightly adapted from the always wonderful Delicious magazine

1 cup minus 1 tablespoon (140g) almond meal
1 cup (140g) all purpose flour
1 teaspoon ground cinnamon
½ teaspoon ground ginger
generous pinch of ground cloves
pinch of salt
½ cup (113g/1 stick) unsalted butter, room temperature
¼ cup (50g) granulated sugar
1 tablespoon honey
½ teaspoon vanilla extract
1 teaspoon Amaretto (optional)
about 3 tablespoons icing sugar, for dusting the cookies

Preheat the oven to 180°C/350°F; line two large baking sheets with baking paper.
In a medium bowl, whisk together almond meal, flour, spices and salt. Set aside.
Using an electric mixer, beat butter, sugar and honey until light and creamy. Beat in the vanilla and the Amaretto. On low speed, add the dry ingredients and mix just until a dough forms – it mixture is too dry, add 1 teaspoon of water and mix again.

Using leveled 2 tablespoons of dough per cookies, roll balls and place them onto prepared baking sheets 2.5cm (1in) apart. Bake for about 20 minutes or until golden. Sift icing sugar over the cookies and return them to the oven for 2 more minutes. Cool on sheets over a wire rack.

The cookies can be kept in an airtight container at room temperature for up to 5 days.

Makes about 30

Tuesday, December 15, 2015

Gingerbread and peanut caramel bars

Gingerbread and peanut caramel bars / Barrinhas de gingerbread, caramelo e amendoim

Having rediscovered the pleasure I used to feel in the kitchen I keep having ideas and imagining things to cook and bake – I can’t wait for the weekends, not only to get some rest but also to prepare something tasty. I made a broccolini pesto the other day that turned out wonderful – even my not-so-into-pesto husband liked it a lot. But right now we are in Christmas mode around here, therefore I bring you these bars: I saw them on the latest issue of Donna Hay magazine and since I am a sucker for gingerbread, caramel and peanuts I had to make them.

They might seem a bit time-consuming, but it is just a matter of respecting the fridge time for each layer – there is also a serious risk of eating the entire saucepan of caramel before pouring it over the gingerbread base, but that is a completely different matter. ;)

Gingerbread and peanut caramel bars
from the always delicious Donna Hay Magazine

Base:
125g unsalted butter, room temperature
90g light brown sugar
1/3 cup golden syrup – I used corn syrup
1/3 cup molasses
375g all purpose flour
1 teaspoon baking soda
2 teaspoons ground ginger
1 teaspoon ground cinnamon
¼ teaspoon ground cloves
pinch of salt
½ teaspoon vanilla extract

Topping:
175g unsalted butter, softened
220g light brown sugar
½ cup golden syrup
1 cup (240ml) heavy cream
200g unsalted toasted peanuts

Lightly butter a 20x30cm baking pan (use a deep pan, or make only 3/4 of the caramel recipe), line it with foil leaving an overhand on two opposite sides and butter the foil as well.
Place butter and sugar in the bowl of an electric mixer and beat until pale and creamy. Add the golden syrup, molasses, flour, baking soda, ginger, cinnamon, cloves, salt and vanilla and beat just until a dough starts to form. Press the mixture into the prepared pan, prick it all over with a fork and refrigerate for 30 minutes – in the meantime, preheat the oven to 180°C/350°F.
Bake the gingerbread for about 15 minutes or until golden – remove from the oven but keep it on.

Make the caramel: place butter, sugar and golden syrup in a medium saucepan and cook over medium heat, stirring until sugar is dissolved and butter is melted. Bring to the boil then cook for 8-10 minutes or until mixture reaches 140°C (285°F) on a sugar thermometer. Carefully add cream – mixture will spit furiously – and stir until dissolved, then cook for 2 more minutes. Stir in the peanuts, remove from the heat and pour over the gingerbread base. Bake for 15-18 minutes or until caramel is slightly set around the edges (caramel will set as it cools). Cool for 15 minutes, then refrigerate until firm. Cut into bars to serve. Keep the bars in an airtight container for up to 5 days in the refrigerator.

Makes 24

Friday, December 11, 2015

Gingerbread pepper cookies

Gingerbread pepper cookies / Cookies de gingerbread com pimenta do reino

So you know that I decided to bake for the Christmas series, got carried away and made cookies beside this cake – I have to tell you, without false modesty, that the cookies turned out wonderful! Soft, packed with oats and perfumed with spices, they were a hit with my family and also my coworkers.

I used to take my baked goods to work all the time in the past, but this was the first time I baked for my new coworkers and I did not know if the girls would like the cookies – they loved them and now I want to bake more delicious things for them. <3

Gingerbread pepper cookies
slightly adapted from the wonderful and beautiful Home Baked: More Than 150 Recipes for Sweet and Savory Goodies

200g all purpose flour
150g rolled oats
1 teaspoon baking powder
¼ teaspoon table salt
generous pinch of freshly ground black pepper
1 teaspoon ground ginger
2 teaspoons ground cinnamon
½ teaspoon ground cloves
½ teaspoon freshly ground nutmeg
150g unsalted butter, room temperature
250g light brown sugar
2 eggs
1 teaspoon vanilla extract
1 teaspoon Cointreau (optional)

Preheat the oven to 180°C/350°F. Line two large baking sheets with baking paper.

In a medium bowl, whisk together the flour, oats, baking powder, salt, pepper and spices. Set aside.
In the bowl of an electric mixer, cream butter and sugar together until light and creamy. Scrape the sides of the bowl occasionally. Beat in the eggs, one at a time, beating well after each addition. Beat in the vanilla and Cointreau. On low speed, mix in the dry ingredients just until combined (do not overmix).

Using a 2-tablespoon cookie scoop drop portions of dough per cookie onto prepared sheets, spacing 5cm (2in) apart. Bake for 12-15 minutes or until cookies are golden around the edges. Cool on sheet over a wire rack for 5 minutes, then slide the paper onto the rack and cool completely.

Cookies can be stored between layers of parchment in airtight containers at room temperature up to 5 days.

Makes about 28

Monday, December 7, 2015

Gingerbread honey cake because Christmas is coming

Gingerbread honey cake / Bolo de gingerbread e mel

I was sitting home the other day, thinking about Christmas and how it is my favorite time of the year. I thought about my Christmas tree, and how I would be decorating it in a few days and felt miserable because this year I would not be able to prepare the Christmas recipes for the blog like I’d done in previous years.

I decided that there would be at least one recipe for the Christmas series this year, went to the kitchen and baked this cake – actually, I baked some cookies, too. ;)

This gingerbread cake is super tender, smells and tastes delicious and will perfume your entire home while in the oven and even after cooled down. It is, in fact, a loaf cake, but the one I used was a bit smaller and I ended up with a loaf + a small round cake (I used a 1-cup capacity pan). Since the mini cake looked so adorable that was the one I used for the photo – I hope the cake’s cuteness entices you to bake it, too, and you can thank me later. ;)

Gingerbread honey cake
slightly adapted from the beautiful Home Baked: More Than 150 Recipes for Sweet and Savory Goodies

85g crystallized ginger
50g crystallized orange peel
220g (1 ½ cups + 1 tablespoon) all purpose flour
½ cup (50g) almond meal
2 teaspoons baking powder
¼ teaspoon table salt
1 teaspoon ground ginger
2 teaspoons ground cinnamon
¼ teaspoon ground cloves
100g unsalted butter, cold and cubed
1 ¼ cups (300ml) whole milk, room temperature
100g light brown sugar
150ml honey
2 eggs
½ teaspoon vanilla extract
½ teaspoon Cointreau (optional)
¼ teaspoon Amaretto (optional)
icing sugar, for dusting

Preheat the oven to 180°C/350°F. Lightly butter a 6-cup capacity loaf pan, line it with baking paper leaving an overhang in two opposite sides and butter it as well.

Chop the crystallized ginger and crystallized peel, place in a bowl and stir in 1 tablespoon of the flour. Set aside.
Combine remaining flour, almond meal, baking powder, salt and spices in the bowl of an electric mixer. Add the butter and on low speed mix the ingredients together until mixture resembles breadcrumbs. Mix in crystallized ginger and orange peel. In the meantime, heat together over low heat milk, brown sugar and honey until honey and sugar are dissolved (mixture should not get too hot, otherwise it might cook the eggs). Pour over the flour mixture and stir until just combined – do not overmix. Stir in the eggs, one at a time, followed by the vanilla, Cointreau and Amaretto.
Pour batter into prepared pan and bake for 50-60 minutes or until risen and golden and a skewer inserted in the center comes out clean. Cool in the pan over a wire rack for 15 minutes, then carefully unmold and cool completely over the rack before peeling off the paper.
Dust with icing sugar to serve.

Serves 8-10

Monday, November 23, 2015

Yogurt lime cheesecake bars

Yogurt lime cheesecake bars / Barrinhas de cheesecake de limão e iogurte

Every time I discover something nice I like to share it with you, being related to food or not – and what makes me happy is that many of you feel the same, and I can ask you about something as far from the kitchen subject as a good product suggestion for frizzy hair that I get many answers – so, thank you. <3

Frizzy hair crisis almost averted – with the help of my Brazilian readers over on Facebook – now it’s my turn to share something special with you: one of my favorite food magazines, one that I use over and over again for both recipes and inspiration has now launched a beautiful website, packed with lots of delicious recipes and stunning photos – I hope you enjoy it!

Even though I rely on Delicious Australia very often, most of the times I tweak the recipes here and there, and this cheesecake slice is no exception: 200g of cookies would be swimming in 175g of butter, so I changed the recipe slightly and was very pleased with the result.

Yogurt lime cheesecake bars
slightly adapted from the wonderful Delicious Australia

Base:
200g digestive cookies
85g unsalted butter, softened

Topping:
½ cup + 2 tablespoons (125g) granulated sugar
finely grated zest of 2 limes
300g thick Greek-style yogurt
300g cream cheese, room temperature
3 eggs
½ teaspoon vanilla extract
pinch of salt
icing sugar, for dusting

Preheat oven to 180°C/350°F. Lightly butter a 20x30cm (8x12in) baking pan, line it with foil leaving an overhang in two opposite sides and butter it as well.

Place the cookies in a bowl of a food processor and blitz until finely crushed. Add the butter and pulse until mixture resembles wet sand. Press firmly into base of pan. Chill for 15 minutes.

In a large bowl, rub sugar and lime zest with your fingerprints until sugar is fragrant. Add the yogurt and cream cheese and whisk to combine. Whisk in the eggs, one at a time, until smooth. Stir in the vanilla and salt, then pour over base. Bake for 20-25 minutes until set and slightly golden around edges. Cool, then chill until set. Dust with icing sugar and cut into bars to serve.

Makes 24

Monday, November 16, 2015

Melted butter banana cake for busy days

Melted butter banana cake / Bolo de banana (feito com manteiga derretida)

It is very clear that I haven’t had time to write for the blog – well, I haven’t had time to cook or bake, really (and all that makes me really sad).

For days like these, when there is barely any time to play around in the kitchen or to write a blog post (type recipes, edit photos and translate them for my other blog), I bring you this banana cake: it is delicious, the recipe is put together in no time at all and since the butter is melted you don’t even have to wait for it to soften. Very quick, very good – exactly what I need nowadays.

Melted butter banana cake
slightly adapted from Dan Lepard

175g granulated sugar
finely grated zest of 1 orange
200g unsalted butter, melted and cooled
250g all purpose flour
3 large eggs
2 tablespoons freshly squeezed orange juice
½ teaspoon vanilla extract
250g very ripe bananas, mashed with a fork
3 teaspoon baking powder
pinch of salt

Preheat the oven to 180°C/350°F. Lightly butter an 6-cup capacity loaf pan and line it with baking paper, buttering it as well.

Place the sugar and orange zest in a large mixing bowl and rub together with your fingertips until sugar is perfumed. Stir in the butter, then beat in 100g of the flour until smooth. Add the eggs one by one, beating each one in well before adding the next, then mix in the juice, vanilla and banana. Sift in the remaining flour, baking powder and salt, and stir until smooth.

Spoon the mixture into the pan and smooth the top. Bake for 60-65 minutes or until risen and golden and a skewer pulls out with only a few crumbs sticking to it, it's done.

Serves 6-8

Monday, October 19, 2015

Rita's stroganoff to celebrate good things

Estrogonofe da Rita / Rita's stroganoff

I was thinking about 2015 these days and about everything that has happened so far, of how my feelings and emotions fluctuated from one side to another, back and forth all the time. I was sad in the beginning of the year because I’d lost a job I liked and could not find another – the whole country is going through a bad phase and many people are out of jobs.

Then my nephew was born and brought so much love and joy to my life, and exactly because I was unemployed I was able to be around him and help my sister in law look after him ever since his first days of life. We have such a strong bond that he smiles and throws himself at me every time he sees me.

I kept thinking that sometimes what at first might seem like a bad thing might actually turn into something good. And I think about my family, how great it is to have my brother, my sister in law and my nephew so close – it fills me with joy to look at table and see everyone together, sharing a meal, laughing, being a family. I made this stroganoff weeks ago for lunch on a Sunday and it was a hit – when I was cooking I saw this big pot of food on the top of the stove and even thought it was too much for 4 people and that there would be some left for a packed lunch on Monday, but everyone liked it so much it was all gone - we ate it all while talking, laughing and being a family. <3

Rita's stroganoff
from the lovely Rita Lobo

2-3 tablespoons olive oil
700g sirloin, cut into 5x2.5cm strips, room temperature
250g button mushrooms, cut into 3-4 slices each lengthwise
1 onion, finely diced
2 garlic cloves, minced
1 ½ cups (360ml) heavy cream
1 ½ tablespoons tomato purée
1 ½ tablespoons ketchup
1 ½ tablespoons Worcestershire sauce
1 ½ tablespoons cognac – I used sherry
salt and freshly ground black pepper

Heat a large saucepan over medium heat. Add 1 tablespoon of the olive oil and add half or 1/3 of the beef – do not fill the pan or the beef will cook in their own juices instead of brown. Brown all the beef in batches, adding more oil after each batch is browned. Set aside.

Add ½ tablespoon of the oil, then the onion and cook until translucent, stirring occasionally to avoid burning – scrape the bottom of the saucepan to remove all the browned bits. Add the garlic and cook until fragrant. Add the tomato purée and ketchup and stir to combine. Return the beef to the saucepan, add the Worcestershire sauce and the cognac and stir to combine. Gently stir in the mushrooms.

Drizzle with the heavy cream and season with salt and pepper. Cook over medium heat for 15-20 minutes or until sauce is slightly thickened, stirring occasionally. Serve immediately with rice or pasta.

Serves 4

Monday, September 28, 2015

Almond, coconut and lime cake

Almond, coconut and lime cake / Bolo de amêndoa, coco e limão

Hello, is there anyone here? :)

It has been a while since I last published a recipe on this blog, and it has been a while since cooked anything new or interesting – I no longer know what baking is, but I’ve told you that already.

Nothing has changed in nearly a month: I’m still working like crazy (and on top of that I have resumed my Spanish classes), I rarely feel like cooking or baking and I don’t think I ever longed for weekends so much in my life before. I hope things get calmer with time and I also hope to be able to go back to cooking, baking and posting here more regularly, for it is something that makes me really happy.

While that doesn’t happen, I hope that after all this time there is still someone reading me for this cake deserves to be shared: it is absolutely delicious, tender and perfumed, and I am sure that I would feel a lot better now if there was still a slice of it around. :)

Almond, coconut and lime cake
slightly adapted from the über beautiful Summer Berries & Autumn Fruits: 120 Sensational Sweet & Savoury Recipes

Cake:
1 cup (200g) granulated sugar
finely grated zest of 2 limes
1/3 cup (75g) unsalted butter, softened
1/3 cup (80ml) olive oil
1 ¾ cups (175g) almond meal
½ cup (50g) unsweetened desiccated coconut
¾ cup + 2 tablespoons (125g) all purpose fl our
2 teaspoons baking powder
pinch of salt
4 medium eggs – I used 3 very large eggs, 70g each
½ teaspoon vanilla extract
3 rounded tablespoons sour cream*

Syrup:
freshly squeezed juice of 2 limes
100ml water
2 ½ tablespoons honey
1 ½ tablespoons granulated sugar

Preheat the oven to 180°C/350°F. Butter a tall 20cm round cake pan, line the bottom with a circle of baking paper and butter it as well.

Place the sugar and lime zest in the bowl of an electric mixer and rub with your fingertips until sugar is fragrant. Set aside.
Melt the butter in a small saucepan over a low heat. Remove from the heat, stir in the olive oil and leave to cool slightly.
In a medium bowl, whisk together the almond meal, coconut, flour, baking powder and salt.
Using an electric mixer, whisk the eggs and sugar on medium-high speed until they are very thick and pale, tripled in volume and leave a ribbon trail when the whisk is lifted from the bowl. Beat in the vanilla. Gently fold the almond mixture, then fold in the butter mixture and sour cream. Pour into the pan, smooth the top and bake on the middle shelf of the oven for 40-50 minutes or until risen and golden and a skewer inserted in the center comes out clean.

Syrup: in a small saucepan, bring the lime juice, water, honey and sugar to the boil. Continue to bubble steadily until reduced by half and syrupy.
Leave the cake to cool in the pan on a wire rack for five minutes. Using a wooden skewer, make holes all over the top of the cake, then slowly pour over the syrup, gradually, waiting for each portion to be absorbed by the cake before pouring more. Let cool completely in the pan.

*homemade sour cream: to make 1 cup of sour cream, mix 1 cup (240ml) heavy cream with 2-3 teaspoons lemon juice in a bowl. Whisk until it starts to thicken. Cover with plastic wrap and leave at room temperature for 1 hour or until thicker (I usually leave mine on the counter overnight – except on very warm nights – and it turns out thick and silky in the following morning; refrigerate for a creamier texture)

Serve 8-10

Monday, September 7, 2015

Cinnamon Cointreau brownies

Cinnamon Cointreau brownies / Brownies com canela e Cointreau

My days have been very busy – a lot busier than I would like them to be, honestly – and I haven’t baked anything in weeks – I don’t even remember when I last turned on the oven for something sweet. Many weekends have gone by without cakes cooling down on racks around here. :(

I’m glad that I made a few baked goods before going back to work and I can share them with you here, like these absolutely wonderful brownies – the original recipe called for ancho chile powder, but I guess I am a bit conservative when it comes to chocolate desserts and don’t like the idea of adding chili to my brownies (sorry, Matt and Renato).

I omitted the chile powder, amped up the cinnamon and switched the fresh ginger for a healthy dose of Cointreau and the brownies turned out delicious – not only in flavor, but also in texture, very moist and fudgy (that is how I like brownies). You can use your imagination and use different spices or go for whisky or Marsala instead of Cointreau, for example, or if you have kids around use just the vanilla – I guarantee the brownies will be equally great.

Cinnamon Cointreau brownies
slightly adapted from the delicious Baked: New Frontiers in Baking and Baked Elements: The Importance of Being Baked in 10 Favorite Ingredients

¾ cup (105g) all-purpose flour
¼ teaspoon salt
1 tablespoon + 1 teaspoon Dutch cocoa powder
1 teaspoon cinnamon
140g (5oz) dark chocolate, chopped – I used one with 53% cocoa solids
½ cup (113g/1 stick) unsalted butter
¾ cup (150g) granulated sugar
¼ cup (44g) packed light brown sugar
3 large eggs
½ teaspoon vanilla extract
3 teaspoons Cointreau

Preheat oven to 180°C/350°F. Lightly butter a 20cm (8in) square pan, line it with foil leaving an overhang on two opposite sides, then butter the foil as well.

In a medium bowl, whisk together flour, salt, cocoa powder and cinnamon. Set aside.
Place chocolate and butter in a large bowl set over a saucepan of barely simmering water (do not let the bowl touch the water) and stir until melted. Turn off heat, but keep bowl over water and add both sugars. Whisk until completely combined and remove bowl from pan. Let stand until room temperature, about 20 minutes.

Add eggs, one at a time, to chocolate-butter mixture and whisk until just combined. Add vanilla and Cointreau and whisk to combine. Do not overbeat the batter at this stage or the brownies will be cakey.
Sprinkle flour-cocoa mixture over chocolate mixture. Using a spatula, fold the dry ingredients into the wet until there is just a trace amount of the flour-cocoa mix visible.
Pour batter into the prepared pan and smooth the top. Bake brownies for 20-25 minutes; brownies are done when a toothpick inserted in the center comes out with a few moist crumbs. Cool brownies completely before cutting and serving.

Makes 16

Sunday, August 30, 2015

Pasta with crispy sardine and oregano breadcrumbs

Pasta with crispy sardine and oregano breadcrumbs / Espaguete com farofinha crocante de sardinha e orégano

When I was a kid, my mom was always making something with canned sardines: they were cheap and a good staple for a family with a limited budget. One of the things she made the most was a sardine salad to be eaten in a sandwich – the same thing as a tuna salad, but made with sardines instead, it was delicious! I loved it.

Because of that, it is impossible not to think of mom whenever I see canned sardines, and when I saw this gorgeous can while food shopping in my last trip I knew I would not come home without it. A couple of weeks ago a new issue of the beautiful Donna Hay magazine arrived and there I found a recipe of pasta served with crispy breadcrumbs dotted with pieces of canned sardines – it was the perfect way of using my treasure.

This pasta dish is very simple and straightforward, I made it for a lazy Sunday lunch and it was ready in no time at all – my husband wasn’t too crazy about the sardine breadcrumbs, but I was more than happy to eat his share by the spoonful. :)

Pasta with crispy sardine and oregano breadcrumbs
slightly adapted from the always fantastic Donna Hay Magazine

400g spaghetti
2 tablespoons olive oil
1 cup fresh breadcrumbs
¼ cup fresh oregano leaves, packed
50g canned sardines, drained and chopped
salt and freshly ground black pepper
2 cloves garlic, finely chopped
6 ripe roma tomatoes, deseeded and cut into wedges
pinch of sugar
1 tablespoon balsamic vinegar

Cook the pasta in a large saucepan of salted boiling water until al dente. Before draining, reserve ½ cup (120ml) of the water to use in the sauce.

In the meantime, make the sauce: heat 1 tablespoon of olive oil in a large nonstick frying pan. Add the breadcrumbs, oregano and sardines and cook, stirring, for 4-5 minutes or until breadcrumbs are golden and crispy. Season with salt and pepper, remove from the heat and keep warm.

Wipe the frying pan clean with a piece of paper towel and add the remaining olive oil. Heat over medium, add the garlic and cook until fragrant, about 1 minute. Add the tomatoes and cook for 5 minutes. Add the sugar, then season with salt and pepper. Add the reserved cooking liquid and the balsamic vinegar, stir to combine and cook for 2-3 minutes or until thickened. Add the pasta to the sauce and toss to coat. Serve topped with the sardine breadcrumbs.

Serves 4

Sunday, August 16, 2015

Orange Marsala pound cake

Orange Marsala pound cake / Bolo de laranja e Marsala

Many, many years ago, without much thought, I started baking a cake every weekend, and it has become a tradition here in my house: if I don’t see a cake cooling over a wire rack on a Saturday it just doesn’t feel like the weekend.

Sometimes I struggle with choosing which cake to make, either because I have too many ideas at once or because I don’t have any. :) Weeks ago I was cooking lunch and as I poured some Marsala over the broccolini I immediately thought of adding it to a cake. After we finished eating I found an orange in my fridge and the flavor of the cake was then decided – just like that. Inspiration coming from all sorts of places – I like that a lot.

This is a moist, delicious and fragrant cake, one that I once made with whisky and nutmeg and that it turned out even more fantastic with a touch of citrus and Marsala.

Do you like making cakes on the weekend? What is your favorite cake flavor?

Orange Marsala pound cake
slightly adapted from the delicious Pure Dessert: True Flavors, Inspiring Ingredients, and Simple Recipes

2 tablespoons whole milk, room temperature
2 tablespoons Marsala wine
3 large eggs, room temperature
1 teaspoon vanilla
150g granulated sugar
finely grated zest of 1 large orange
105g cake flour (homemade: 15g corn starch + 90g all purpose flour)
55g whole wheat flour
¾ teaspoon baking powder
1/8 teaspoon table salt
180g unsalted butter, softened and in chunks

Preheat the oven to 180°C/350°F. Lightly butter a 4 to 5 cups loaf pan, line it with baking paper and butter the paper.

In a medium bowl, whisk the milk, Marsala, eggs, and vanilla to combine.
In the bowl of an electric mixer, combine sugar and orange zest and rub with your fingertips until sugar is fragrant. Whisk in the flours, baking powder and salt. Add the butter then pour in half of the egg mixture. Beat on low speed just until the dry ingredients are moistened. Increase the speed to medium and beat for 1 minute. Scrape the sides of the bowl. Add half of the rest of the egg mixture and beat for 20 seconds. Add the rest of the egg mixture and beat for 20 seconds. Scrape the sides and bottom of the bowl.

Transfer the batter to the prepared pan and smooth the surface. Bake until golden and risen and a toothpick comes out clean, 55-60 minutes. Cool the cake in the pan for 20 minutes, unmold carefully and transfer to a wire rack. Cool completely, then peel off the paper.

Serves 8-10

Wednesday, August 12, 2015

Waffles for crazy, hectic days

Waffles

My days have been pretty hectic lately, too much to learn in a short period of time – I haven’t cooked much and I don’t remember the last time I actually baked something (I made chocolate mousse last weekend for Sunday’s lunch, let’s pretend that counts). :) The crazy routine is not supposed to last forever, and while it does I’ll try not to let it get in the way of my posts here, but I won’t make promises I cannot keep – I just hope that those of you who have been around for so long bear with me during these days and do not jump ship. :)

I made these waffles a couple of weeks ago to go with an episode of Hannibal (I am brave enough to eat while watching it) and they turned out so good I had to share them with you: crunchy on the outside, tender on the inside, perfumed with vanilla, they are absolutely delicious, and the good thing is the batter is put together in no time and can be refrigerated overnight if tightly covered – if you’re pressed for time like I have been lately, this recipe should be permanently on your refrigerator door.

Waffles
from the beautiful Falling Cloudberries: A World of Family Recipes

2 eggs, separated
pinch of salt
1/3 cup (67g) granulated sugar
½ teaspoon vanilla
4 ½ tablespoons (63g) unsalted butter, melted and cooled
1 ½ cups (210g) all purpose flour
½ teaspoon baking powder
¾ cup (180ml) whole milk, room temperature

Whisk the egg whites and the salt until they’re fluffy and just holding soft peaks.
In a large bowl, whisk the egg yolks with the sugar and vanilla until creamy. Whisk in the butter, then the flour and baking powder (batter will be thick). Add the milk, then fold in the egg whites.

Heat a waffle iron. Add about 1/3 cup of batter per waffle, then cook following the manufacturer's instructions, until the waffles are golden brown. Serve immediately.

Makes about 6

Saturday, August 8, 2015

Garibaldi slice

Garibaldi slice / Barrinhas Garibaldi

The first time I ever heard of Garibaldi cookies was many, many years ago, on my dear friend Valentina’s blog – I wasn’t very fond of raisins then, I thought the cookies looked good but I never considered the idea of actually making them.

Through the years I learned to like raisins, then I tried dried currants for the first time eating scones in London (with loads of clotted cream – the thought of it makes me drool already) and now I love using them in cookies (these are my favorite cookies with raisins) and even in bread.

When I saw this Garibaldi slice on one of the most beautiful cookbooks I own I could not resist: the recipe calls for dried currants, raisins and golden raisins (sultanas) and they are cooked in sherry before becoming the filling for the bars – I had to make them! The bars turned out delicious and they are a treat for those of us who like raisins.

Off topic: as I browsed Amazon to get the link for the cookbook I saw that they have cast Diego Luna to play Casanova – that is wrong in so many ways words fail me.

Garibaldi slice
from The Baking Collection (The Australian Women's Weekly)

Pastry:
300g all purpose flour
75g granulated sugar
pinch of salt
180g unsalted butter, cold and diced
2 egg yolks
½ teaspoon vanilla extract
1 tablespoon iced water

Filling:
240g dried currants
80g sultanas
75g raisins
½ cup (120ml) water
2 tablespoons dry sherry
1 egg, lightly beaten with a fork, for brushing the pastry
2 tablespoons granulated sugar, for sprinkling the pastry

Pastry: place flour, sugar and salt in the food processor and pulse to combine. Add butter and pulse until mixture resembles coarse meal. Add egg yolks, vanilla and water and pulse until a dough starts to form (add more water, 1 teaspoon at a time, if necessary). Form dough into a ball, divide in two equal parts and wrap in cling film. Refrigerate for 1 hour.

Filling: in a medium saucepan, combine currants, sultanas, raisins, water and sherry. Stir over low heat for 8-10 minutes or until liquid is absorbed and fruit is soft. Transfer to the food processor and blend until creamy. Cool completely.

Preheat the oven to 180°C/350°F. Lightly butter a 20x30cm baking pan, line with foil leaving an overhang on two opposite sides and butter the foil as well.

Roll one portion of the pastry between two pieces of baking paper, flouring it a little if necessary (don’t use too much flour or the pastry will dry out) until it is large enough to line the base of the baking pan. Transfer pastry to the pan and trim to fit. Prick pastry all over with a fork, then spread with the fruit filling. Roll the other portion of pastry until large enough to cover fruit filling, place on top of it and trim to fit. Press down to enclose the filling. Wish a sharp knife, cut the top layer into 24 rectangles. Prick the pastry all over with a fork, brush it with the beaten egg and sprinkle with the extra sugar. Bake for about 30 minutes or until golden. Cool completely in the pan over a wire rack, then cut into slices using the cuts previously as a guide.

Makes 24

Sunday, August 2, 2015

Olive oil buns and great news

Olive oil buns / Pãezinhos de azeite de oliva

There hasn’t been a new post around here in a good while but there is a good reason for that: my job hunt has come to an end! Days ago I started working in a new company (for those of you who don’t know, I work as an executive assistant) and it was a very busy week – it was all about meeting lots of new people, getting to know how the company works and the details of my job description. I feel really, really happy for having a job again after so many months, so this is a celebration post! \0/

I know that some of you might look away from this recipe because of the many steps, but let me tell you something: these buns are easy peasy and what you really need is a bit of time to spare and a bit of prepping in advance – you don’t have to do much with the dough besides leaving it at room temperature, covered with plastic wrap.

I chose this recipe for today’s post exactly because in life sometimes we need to be patient and wait for the Universe to do its thing – some things can’t be rushed, no matter how anxious or even sad we feel (like I did weeks ago). In this case, I can guarantee that the buns are worth all the hours called for in the recipe: they are delicious and have an amazing texture.

Olive oil buns
slightly adapted from Bread Cake Doughnut Pudding: Sweet And Savoury Recipes From Britain's Best Baker

Ferment:
65g all purpose flour
65g water, room temperature
1g dried yeast

Dough:
200g lukewarm water
pinch of sugar
2g dried yeast
350g all purpose flour
4g table salt
90ml olive oil – I used extra-virgin

Make the ferment: combine the ingredients in a small bowl, cover with plastic wrap and leave at room temperature for 24 hours.

Bread: put the water in the bowl of an electric mixer and whisk in the yeast and sugar until dissolved, then set aside until it foams, about 5 minutes. Add the ferment, flour and salt, mix on medium speed for 5 minutes or until the dough starts to come away from the sides of the bowl. continue mixing on medium speed and gradually pour in ¼ cup (60ml) of the olive oil, then keep mixing until dough is smooth, glossy and elastic (it will be a very wet dough). Form roughly into a ball, cover with plastic wrap and leave at room temperature for 1 hour (if the day is too cold, leave the oven on so the kitchen is a bit warm).

After 1 hour, using a rubber spatula, mix in the remaining 2 tablespoons olive oil, 1 tablespoon at a time. Cover again with plastic wrap and leave at room temperature for 1 hour.

Lightly brush a 12-cup muffin pan with olive oil. Divide the dough into 12 equal portions and roll each into a ball, making sure the top is smooth. Place the balls into the prepared muffin pan and let them prove for 1 hour – in the meantime, preheat the oven to 220°C/425°F. Bake the buns for 15-20 minutes or until golden. Cool in the pan over a wire rack for 5 minutes, then carefully unmold and place onto the rack. Serve warm or at room temperature.

Makes 12

Saturday, July 25, 2015

Madeira cake

Madeira cake / Bolo Madeira

Every time I tell people that my husband doesn’t like sweets I usually get a “I can’t believe it!!!” in return: for the amount of baking I do it must be really hard to believe he doesn’t eat all the cakes, cookies and brownies – well, he doesn’t, so the rest of the family enjoys them with me, no problem. :)

Even though I love sharing my baked goods, there are times I like having something around just for myself, like a slice of cake, for instance, to go with coffee or tea, but as much as I love sweets I can’t polish something off in a short period of time, that is why I was thrilled to make this Madeira cake – the recipe says that the cake improves if eaten the next day, so I imagined that it would improve even more a few days later and I was right: the citrus flavors get more intense and the smell is intoxicating (every time I opened the container for a slice of cake it smelled better than before).

This Madeira cakes has a different texture from the one I baked a long time ago – it is more compact, not so tender, but I found it perfect with a cup of coffee; this cake is tastier, too, and the little nuggets of crystallized orange peel add a nice twist to it.

Madeira cake
slightly adapted from the delicious and beautiful National Trust Simply Baking

170g all purpose flour
1 ¼ teaspoons baking powder
pinch of salt
170g granulated sugar
finely grated zest of 1 orange
finely grated zest of 1 lime
170g unsalted butter, softened
4 medium eggs, lightly beaten with a fork*
1 tablespoon lime juice
2 teaspoons Cointreau (optional)
½ teaspoon vanilla extract
55g crystallized orange peel, chopped – toss it with a bit of the flour so it doesn’t sink to the bottom of the cake

Preheat the oven to fan 180°C/350°F. Lightly butter a 20x10cm (8x4in) loaf pan, line it with baking paper and butter it as well.

In a medium bowl, whisk together the flour, baking powder and salt. Set aside.
In the bowl of an electric mixer, combine sugar, orange and lime zest and rub together with your fingertips until fragrant. Add the butter and cream until pale and fluffy – scrape the sides of the bowl occasionally. Beat in the eggs, a little at a time, waiting until the egg is fully incorporated before adding some more – scrape the sides of the bowl occasionally. Beat in the lemon juice, Cointreau and vanilla. Using a rubber spatula, stir in the dry ingredients and the orange peel.
Spoon the mixture into the pan and bake for 50-60 minutes or until risen and golden and a skewer inserted in the center comes out clean.
Cool in the pan over a wire rack for 30 minutes, then carefully unmold and cool completely on the rack. Peel off the paper and wrap the cake in cling film, then in foil. Leave it at room temperature overnight.

* my eggs were way too big, so I used 3 instead of 4 and each weighed 75g

Serves 8-10

Sunday, July 19, 2015

Saffron lemon cookies and Claire Danes

Saffron lemon cookies / Biscoitinhos de limão siciliano e açafrão

Those of you around here for a while know how much I enjoy movies and TV awards – I root for my favorites, hate it when the ones I find untalented and undeserving win and usually go to sleep at 2 in the morning. :)

For a couple of years I saw Claire Danes take home lots of awards for her role in Homeland and I did not quite understand why: I like her, I find her a talented actress and very versatile, too – who doesn't love Angela Chase? –, but those were the years she was going against Glenn and Mireille, and those two certainly deserved taking the awards home – I was rooting for them for Damages and The Killing are deep favorites of mine.

Now that I have started watching Homeland – and got completely addicted to it – I understand all the fuss: Claire is really amazing in it! If at first I did not understand all the awards, now I say “keep them coming!” :)

I’m OK with my favorites not winning as long as the ones who do actually deserve the awards, and now I see that is exactly what happened with Claire Danes; in September my heart will be divided for I would love her to win, just as much as I would love Viola Davis, Elisabeth Moss and Robin Wright – I haven’t watched season 3 of House of Cards yet but I am sure she’s fabulous in it.

As for these cookies, they look plain but they have a very special ingredient in them: saffron (which was the name of a character’s dog in Damages). :) I don’t use it very often for it is an expensive ingredient, but I could not resist trying them in cookies along with lemon and almond – they were delicious! The almond meal gives the cookies a wonderful texture that is why I recommend this recipe even if you don’t have saffron around: I am sure that cardamom would be beautiful here, or nutmeg, for instance.

Saffron lemon cookies
slightly adapted from the beautiful and delicious Annie Bell's Baking Bible: Over 200 triple-tested recipes that you'll want to make again and again

1 cup (100g) almond meal
1 cup (140g) all purpose flour
1 teaspoon baking powder
¼ teaspoon table salt
½ cup (113g/1 stick) unsalted butter, softened
1 cup (200g) granulated sugar
1 egg
finely grated zest of 2 lemons
½ teaspoon vanilla extract
20 saffron filaments, ground and mixed with 1 ½ teaspoons boiling water – let it cool before using

In a medium bowl, whisk together the almond meal, flour, baking powder and salt. Set aside.
Using an electric mixer, cream butter and sugar together until light. Beat in the egg, lemon zest, vanilla and saffron infusion. On low speed, mix in the dry ingredients just until a dough forms. Cover with cling film and refrigerate for 4 hours or overnight.

Preheat the oven to 180°C/350°F. Line two large baking sheets with baking paper.
Roll 2 teaspoons of dough per cookie into balls and place 5cm (2in) onto prepared sheets. Bake for 10-12 minutes or until golden around the edges. Cool on the sheets over a wire rack for 5 minutes then carefully slide the paper with the cookies onto the wire and cool completely.

Makes about 45

Wednesday, July 15, 2015

Stripy courgette, tomato and polenta tart

Stripy courgette, tomato and polenta tart / Torta de polenta, tomate e abobrinha

New cookbooks can be a lovely surprise, a big disappointment or something in between – even with the “Search Inside” feature at Amazon I’ve had my share of regret buying some of them.

My latest purchase, however, was an epic win: I got Annie Rigg’s beautiful cookbook on fruit and Georgina Fuggle’s Take One Veg, and they’re both insanely beautiful – I feel like making each and every recipe on both of them, for there is nothing tricky despite the deliciousness of everything.

I made one of Rigg’s recipes and it was wonderful, but more on that later on this week – Georgina’s idea of using polenta as a tart base was such a hit at home that I had to share it with you: even my husband ate it gladly, and that is certainly something not to be taken lightly. The tart was a cinch to make and served with a green salad it was a delicious meal, one that I plan on repeating with different vegetables.

Stripy courgette, tomato and polenta tart
slightly adapted from the absolutely delicious Take One Veg: Over 100 Tempting Veggie Recipes for Simple Suppers, Packed Lunches and Weekend Cooking

Crust:
500ml hot vegetable stock
140g polenta - since the recipe doesn't state what kind of polenta it is, I used this one (I was out of instant polenta)
1 tablespoon unsalted butter
50g Parmesan cheese, finely grated
1 egg, lightly beaten
salt and freshly ground black pepper

Filling:
2 tablespoons crème fraîche – I used homemade sour cream
1 small courgette, thinly sliced
2 tomatoes, sliced into thin slices
1 tablespoon fresh thyme leaves
50g Parmesan cheese, finely grated

Start by making the polenta crust: bring the vegetable stock to a simmer in a medium saucepan and pour the polenta into the water. Keep your pan over a low heat and, using a wooden spoon, stir the mixture constantly, thrashing out any lumps that try to form. Continue for around 6 minutes until the polenta is very thick.
Remove from the heat and add the butter and Parmesan and stir until they have disappeared. Cool for 5 minutes, then stir through the beaten egg and season with salt and pepper. Let cool slightly – in the meatime, preheat the oven to 200°C/400°F.

Lightly grease a square 21cm tart pan with olive oil (I used butter). Put the polenta in the centre and, using a spatula or oiled fingers, gently tease it up the sides of the pan to create the sides of the crust.
Smother a thin layer of crème fraîche over the base of your tart and top with half the Parmesan. On top of the cheese, alternate slices of courgette and tomato. Finish with the thyme leaves and the remaining Parmesan.

Bake on the middle shelf of the oven for 45 minutes, then reduce the temperature to 180°C/350°F and bake for a further 15 minutes. Remove and allow the tart to cool for 5-10 minutes to allow it to ‘come to’. Serve in slices.

Serves 4 – I made the recipe above using a 30x10cm (12x4in) tart pan – there was a bit of polenta left that I formed into pancake, grilled on both sides with a tiny bit of olive oil until golden and topped with cheese and dried oregano for a snack (there is a photo here).

The recipes says it serves 4, but the tart I made was polished off by 2 served with a green salad! :)

Sunday, July 12, 2015

Butterscotch blondies

Butterscotch blondies / Blondies de caramelo

The first time I ever heard of anything butterscotch was after I started blogging – I used to make caramel all the time for this dessert, but it was always the simple kind, the one made with sugar and water only: the caramel made with sugar, butter and cream was a revelation to me.

After that, I saw many recipes with butterscotch in their names, but it meant that they called for butterscotch chips, something one cannot find here. I can’t remember how many recipes for butterscotch blondies and cookies I’ve seen so far and most of them called for the chips, that is why I was really eager to make these blondies for they did not call for any chips at all: the caramel was part of the batter, and that sounded too good not to try.

Another thing that having a food blog has taught me is to trust my feelings: the recipe sounded good, indeed, but the amounts of sugar and flour looked way too much – I would end up having a sugar high or baking a stodge (or both). So I baked the blondies my way and they turned out not tooth achingly sweet, gooey and soft, the way I wanted them to be, and with a strong caramel flavor – delicious.

Butterscotch blondies
slightly adapted from the beautiful Home Baked Comfort (Williams-Sonoma) (revised): Featuring Mouthwatering Recipes and Tales of the Sweet Life with Favorites from Bakers Across the Country

½ cup (113g/1 stick) unsalted butter
300g light brown sugar
1 cup (240ml) heavy cream
2 teaspoons pure vanilla extract
2 tablespoons dark rum
½ teaspoon table salt
250g all-purpose flour
¾ teaspoon baking powder
2 large eggs

In a saucepan, melt the butter over medium heat. Using a heatproof rubber spatula, stir in the brown sugar and cook until the sugar starts bubbling like molten lava, about 4 minutes. Reduce the heat to medium-low, stir in the cream, and let it bubble away, stirring with a big whisk, until smooth and slightly thickened, about 10 minutes. Stir in the vanilla, rum, and salt. Let cool to room temperature.

Position a rack in the middle of the oven and preheat to 180°C/350°F. Butter a 20cm (8in) square baking pan, line it with foil leaving two overhangs on opposite sides and butter it as well.
In a bowl, whisk together the flour and baking powder. Stir the butterscotch mixture into dry ingredients, then whisk the eggs in, one at a time, beating well after each addition.
Spread the batter into the prepared dish and bake until a toothpick inserted in the center comes out relatively clean, 20-25 minutes. Let cool completely in the pan, then cut into squares.

Makes 16

Tuesday, July 7, 2015

Orange and rosemary cake and hoping for the best

Orange and rosemary cake / Bolo de laranja e alecrim

Much is said about small joys in life, but today I got myself thinking also about small hopes: things we do hoping for the day (or the week, or the month) to be better.

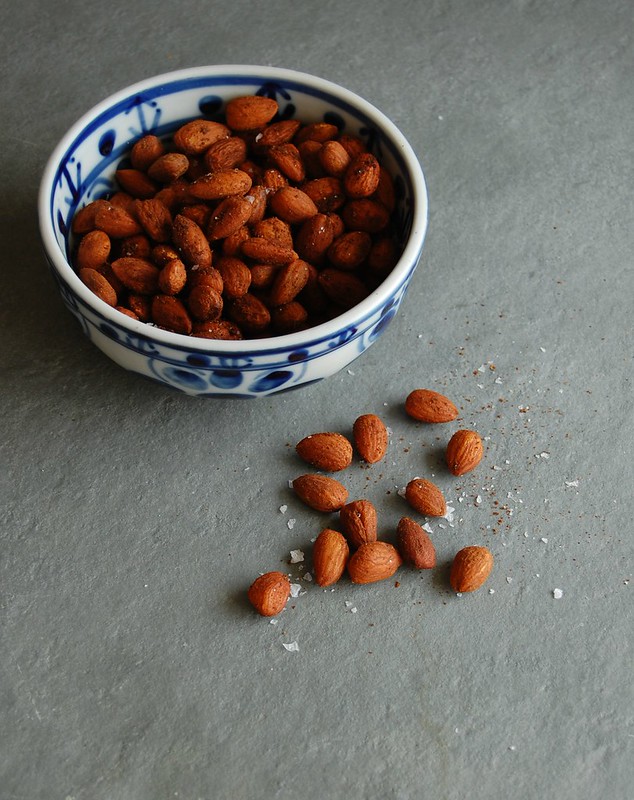
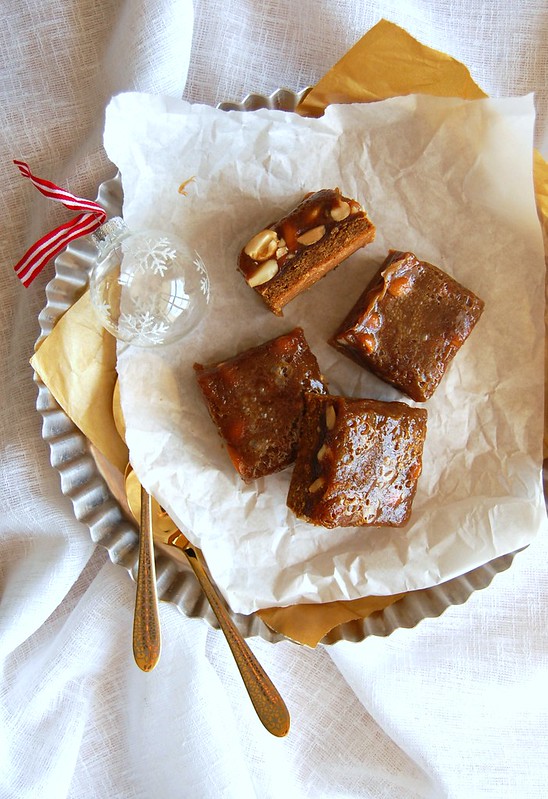
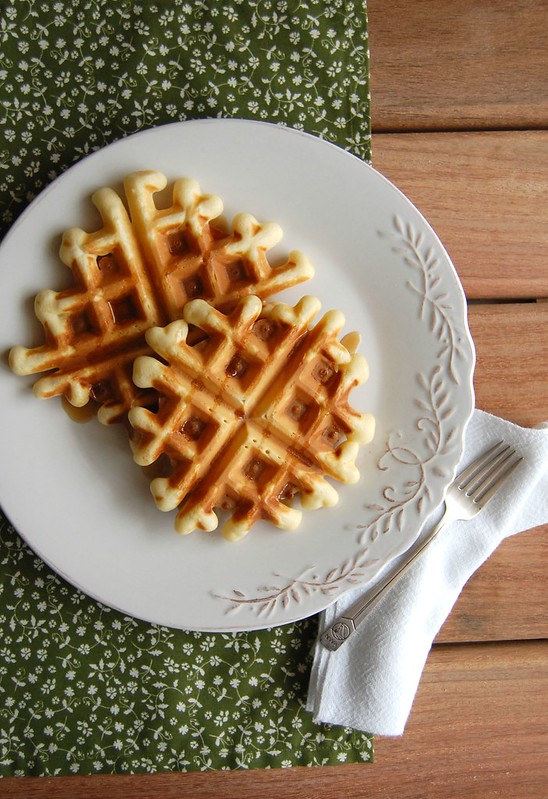
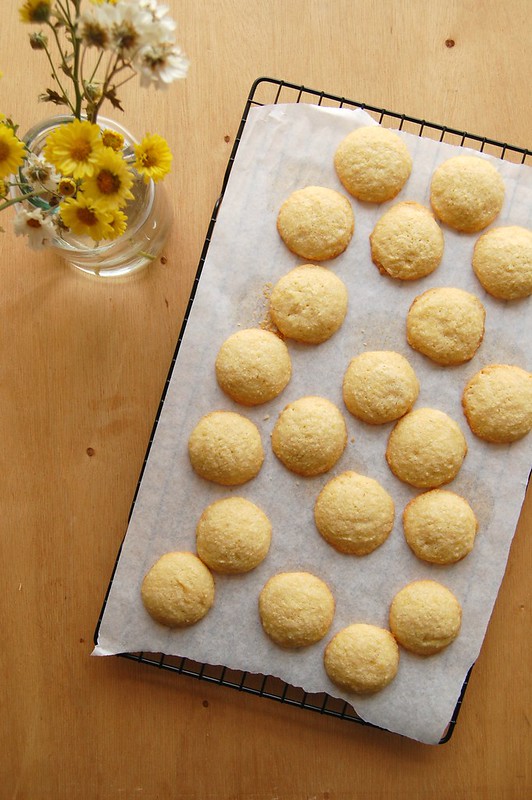
I entered a shop earlier on today searching for a product that would make my hair shinier and softer without making it greasy (those of you who have oily hair like I do know what I’m talking about). I know it might sound silly or even vain, but that small gesture was done in order to make my day a bit sweeter – when you spend months searching for a new job without any success it is the small things that keep you going, combined with the support from your loved ones. It is putting a pair of comfy socks on a cold day, discovering a great TV show, singing in the shower, making a delicious meal out of whatever is left in the fridge or taking a beautiful cake out of the oven – on those days when frustration gets the best of me I avoid anything else that can disappoint me: those are the days for tried and true recipes, when you need a success to lift the spirit, not the days to try something new that can look (or taste) weird.

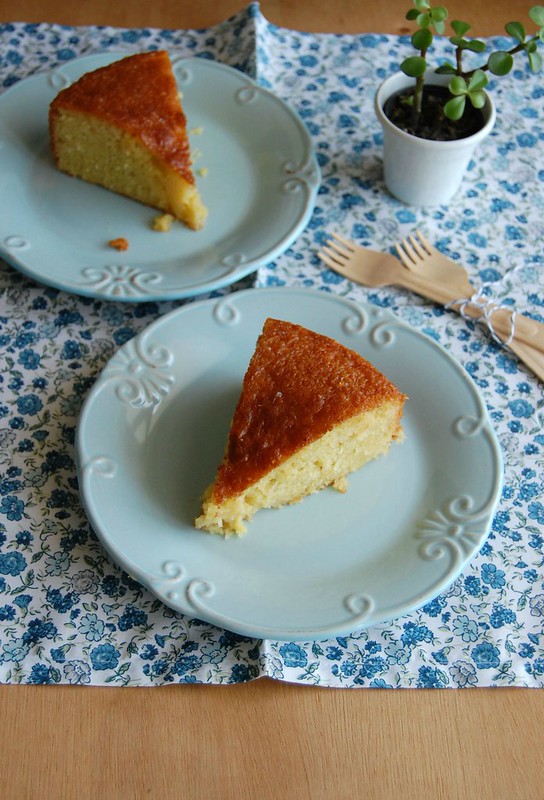
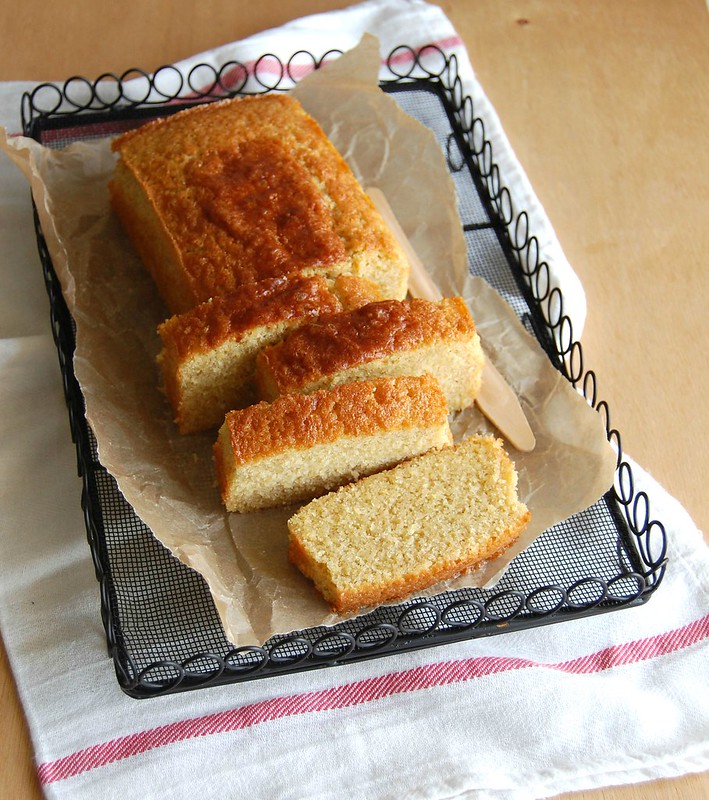
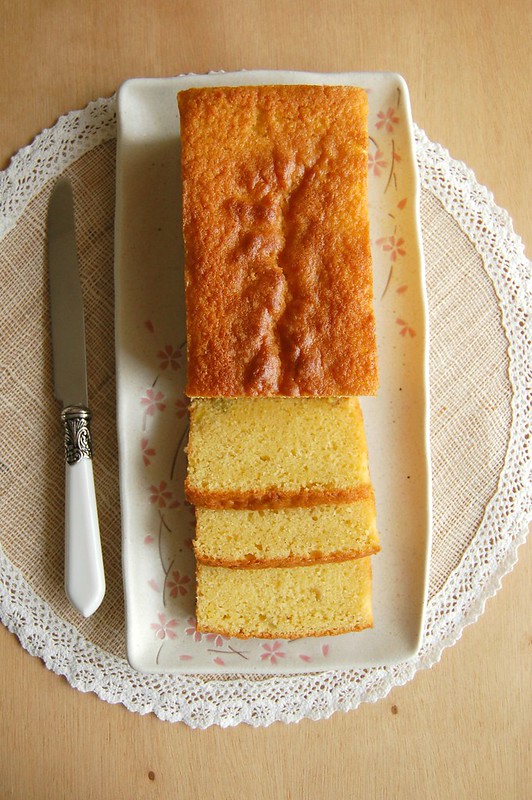
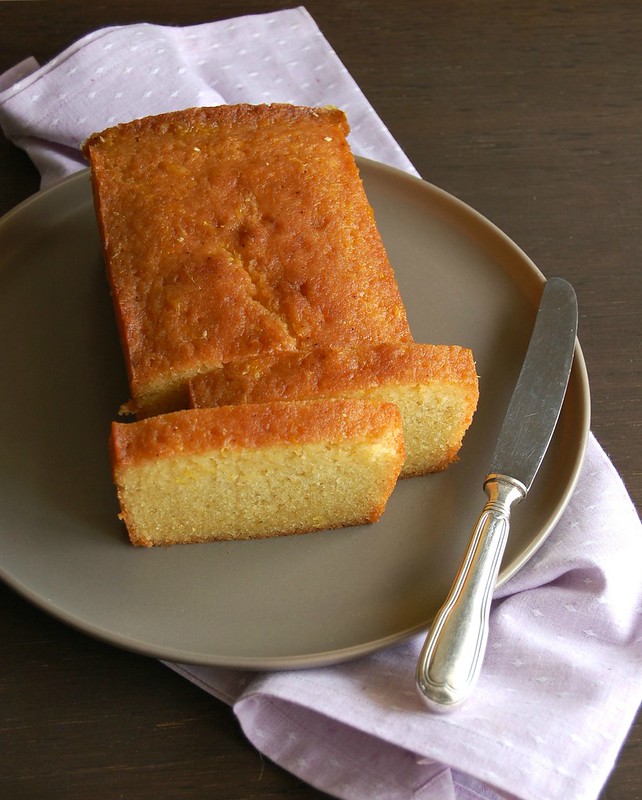
On one of those blue days I made my current favorite cake, the moist and delicious recipe by Nigel Slater, but swapped the lemon and thyme for orange and rosemary (I told you I would try to be braver when it comes to rosemary, right?). The flavor combo worked beautifully in cake form as it did in the cookies and the day was saved.

Orange and rosemary cake
slightly adapted from the always fantastic Nigel Slater

Cake:
100g all purpose flour
1 teaspoon baking powder
pinch of salt
100g almond meal
2 teaspoons rosemary leaves, packed
200g granulated sugar
200g unsalted butter, softened
finely grated zest of 2 medium oranges
4 eggs
½ teaspoon vanilla extract

Syrup:
2 tablespoons granulated sugar
juice of the 2 oranges used in the cake batter
1 teaspoon rosemary leaves, packed

Preheat the oven to 180°C/350°F. Lightly butter a 900g/2lb loaf pan, line it with baking paper and butter the paper as well.
Cake: in a medium bowl, sift together the flour, baking powder and salt, then stir in the almond meal. Set aside. Using a pestle and mortar, crush the rosemary leaves with some of the sugar until the leaves are finely ground and the sugar turns green and perfumed. Using an electric mixer, cream the butter, the rosemary sugar, remaining sugar and orange zest until pale and fluffy. Beat in the eggs, one a time, beating well after each addition. Scrape the sides of the bowl occasionally. Beat in the vanilla. On low speed, gradually mix in the dry ingredients.
Transfer the batter to the prepared pan and bake for about 45 minutes, or until golden and a skewer inserted in the center comes out clean.

When the cake is almost baked, make the syrup: in a small saucepan, combine the sugar and orange juice. Cook over medium heat until sugar is dissolved, add the rosemary and cook for 1 minute. Remove from the heat (fish out the rosemary right before pouring the syrup over the cake).

As soon as the cake is out of the oven, prick it all over with a toothpick or skewer and gradually pour the syrup, waiting for the cake to absorb it. Cool completely before unmolding and serving.

Serves 6-8

Related Posts with Thumbnails