Monday, July 30, 2012

Spiced apple turnovers + the end of a brilliant trilogy

Spiced apple turnovers / Tortinhas de maçã e especiarias

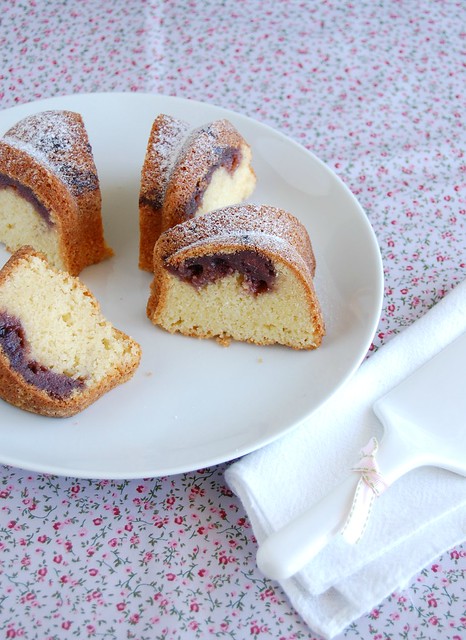
After months and months of sheer anxiety – Christopher Nolan did to me what Fincher had done in 2010 and 2011 – the moment I’d waited for had finally arrived : the day I saw the end of a brilliant trilogy.

*spoilers*

I won’t use the word “perfect” to describe “The Dark Knight Rises” – I’ll save the adjective for “The Dark Knight”, which in my opinion is a better movie – but I will say that not many movies had the effect that “TDKR” had over me; the first minutes of the film had me holding my breath without even noticing, and I was blown away both by the powerful music and by the introduction of the villain, the moment Tom Hardy started his magnificent show as Bane – when someone wearing a mask that covers half their face gives you the performance of a lifetime you know you’re in for a treat, and only an actor who fully trusts his director would devote himself to something like that, like very few before him. One could see that Anne Hathaway put a lot of effort into her character and congrats to her for that, but Michelle Pfeiffer made it impossible for any other mortal do play Selina Kyle – I don’t even like Pfeiffer, I find her mediocre as an actress, but that role is something she played to perfection. Months ago I read that Nolan had done nearly the impossible to get Marion Cotillard to play Miranda Tate (she would have been my choice for the role of Selina Kyle), even modifying the filming schedule to accommodate the actress’ pregnancy, and I only understood why after watching the movie – kudos to you, Nolan, that was a magnificent choice, and bringing the always wonderful Cillian Murphy and Liam Neeson for a couple of scenes was the icing on the cake.
One of the many reasons I find Nolan’s Batman trilogy a work of art is the choice of a fantastic cast, which started by choosing a real talented actor for the main role (unlike his predecessors), and surrounding him with equally talented people; besides that, he’s not afraid to go to dark places, which makes perfect sense since his hero is a very dark, troubled person. That is why I did not care for some moments of the movie, like Selina kissing Batman before the final trip with the plane – too cheesy, and that is not Nolan. The introducing of Robin was deeply disappointing to me because I don’t like the character and I also think that Gordon-Levitt would make a perfect Riddler. But overall, the movie hit all the marks I expected it to: visually impeccable, with a really good script and equally good performances; it gives the character the closure it deserved and will probably make everyone pay more attention to Tom Hardy, who had the ungrateful mission of “competing” with Heath Ledger’s sublime performance and did an excellent job. And from Nolan I continue to expect only the best, because that is what he has shown so far.

* end of spoilers*

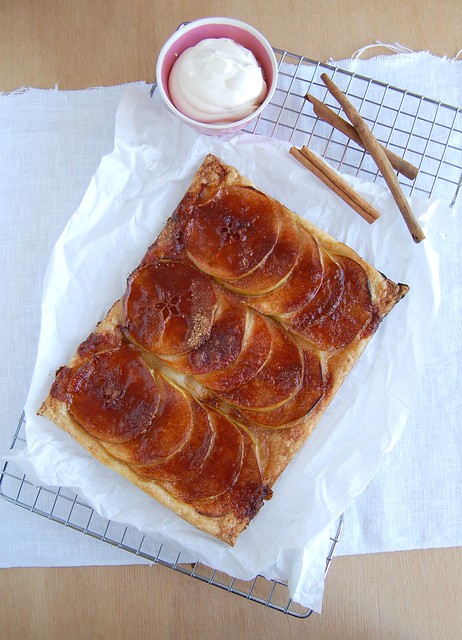
These turnovers, which to me are the healthier and more delicious version of a certain “restaurant’s” apple pie, are not difficult to make and will please children of all ages, I am sure; the recipe comes from my favorite dessert cookbook, the one I cannot live without.

Spiced apple turnovers
from the always, always amazing Bon Appetit Desserts: The Cookbook for All Things Sweet and Wonderful

Pastry:
1 ½ cups (210g) all purpose flour
2 teaspoons granulated sugar
pinch of salt
½ cup (113g/1 stick) unsalted butter, chilled and cut into 1cm (½in) cubes
1 tablespoons (or more) ice water

Filling:
675g (1 ½ pounds) Granny Smith apples, peeled, cored and cut into 1cm (½in) pieces
1/3 cup (66g) granulated sugar
1 teaspoon brandy
½ teaspoon cinnamon
½ teaspoon vanilla extract
¼ teaspoon finely grated lemon zest
¼ teaspoon freshly ground nutmeg
1/8 teaspoon ground cloves
6 teaspoons + 1 tablespoon unsalted butter
about 2 tablespoons granulated sugar, extra

Pastry: whisk flour, sugar and salt in a large bowl. Add butter and rub in with fingertips until mixture resembles coarse meal. Add 4 tablespoons ice water, mix with a fork until moist clumps form, add more ice water if dough is too dry – I made the pastry using the food processor.
Transfer dough to floured surface, divide into 6 equal parts, form each into a ball, flat into a disk, wrap in plastic and refrigerate for at least 1 hour (can be refrigerated overnight).
Line two large baking sheets with baking paper. Roll out each dough disk on a lightly floured surface to a 20cm (8in) round. Transfer rounds to prepared sheets, cover and refrigerate for 30 minutes.
Make the filling: mix apples, sugar, brandy, cinnamon, vanilla lemon zest, nutmeg and cloves in a large bowl, cover and let stand for 30 minutes.
Preheat the oven to 200°C/400°F. Spoon ½ cup drained apple mixture onto bottom half of 1 pastry round, leaving a 2cm (¾in) border around edges. Dot filling with 1 teaspoon butter, lightly brush the edges of pastry with water. Fold top half of dough over filling and enclose completely. Gently press the edges together to seal, then, using a fork, gently press edge to seal. Repeat with remaining pastry rounds, filling and butter. Place the turnovers onto a large baking sheet lined with baking paper. Cut 3 slits on top of each turnover. Melt remaining 1 tablespoon butter and brush the turnovers. Sprinkle with the extra sugar.
Bake turnovers until golden brown, about 30 minutes. Cool slightly before serving.

Makes 6

Saturday, July 28, 2012

Vanilla cupcakes with blackcurrant preserves icing

Vanilla cupcakes with blackcurrant preserves icing / Cupcakes de baunilha com cobertura de geléia de cassis

Looking for a recipe to use up the jam left in the jar after making this cake, I found an old magazine scrap with a recipe for apple cupcakes with blackcurrant icing; I thought it sounded delicious but did not have any apples around (I’d devoured them in crumble form a couple of hours before, mea culpa). Then I thought that a neutral flavor, like vanilla, would be a good substitute for the apple since it would let the icing shine – that was how these tender, simple yet flavorsome cupcakes were created.

Vanilla cupcakes with blackcurrant preserves icing
adapted from the wonderful Gourmet Today: More than 1000 All-New Recipes for the Contemporary Kitchen + an old magazine scrap

Cupcakes:
¾ cup (105g) all purpose flour
1 teaspoon baking powder
1/8 teaspoon salt
¾ stick (85g) unsalted butter, softened
1/3 cup + 2 tablespoons (90g) granulated sugar
1 large egg
1 teaspoon vanilla extract
1/3 cup + 1 tablespoon whole milk, room temperature

Icing:
½ cup (70g) icing sugar
100g blackcurrant preserves
2-3 teaspoons lemon juice

Put oven rack in middle position and preheat oven to 180°C/350°F. Line a twelve-cavity muffin pan (1/3 cup capacity each cavity) with paper liners.
Whisk together flour, baking powder, and salt in a bowl. Beat together butter and sugar in a large bowl with an electric mixer at medium-high speed until pale and fluffy, about 4 minutes. Add egg and beat until just combined. Scrape the sides of the bowl, then beat in vanilla. Reduce speed to low, then add flour mixture and milk mixtures alternately in batches, beginning and ending with flour and mixing until just combined.
Divide batter among muffin cups, filling them two-thirds full, and bake until tops are pale golden and a wooden pick or skewer inserted in centers comes out clean, about 15 minutes. Cool in the pan for 5 minutes, then carefully remove and transfer to a wire rack. Cool completely.
Make the icing: sift the icing sugar into a medium bowl. Add the preserves and mix well. Gradually add the lemon juice, mixing until desired consistency. Pour over the cooled cupcakes and set aside to set, about 30 minutes.

Makes 12

Thursday, July 26, 2012

Ginger and molasses cake + Christian Bale (again)

Ginger and molasses cake / Bolo de gengibre e melado

I know that by telling you again how much I adore Christian Bale I might sound like a broken record, but what can I do? Not only is he an amazing and versatile actor – one of my top favorites – he’s also been making headlines these past few days for all the right reasons – how can one not love the guy? :)
“The Dark Knight Rises” opens tomorrow here in Brazil and my tickets were bought a long, long time ago; anxiety has been building up and I cannot wait to watch the movie.

***
This incredibly tender cake, deliciously perfumed with ground ginger and dotted with little nuggets of crystallized ginger has become a favorite: it has a wintry feel (perfect for July), can feed a crowd and besides being easy to make it is prepared in one saucepan (less washing up). ;)

Ginger and molasses cake
slightly adapted from the always fabulous Donna Hay Magazine

2 1/3 cups + 1 tablespoon (335g) all purpose flour
1 tablespoon ground ginger
pinch of salt
2/3 cup (150g) unsalted butter, chopped
2/3 cup golden syrup (I used corn syrup)
2/3 cup molasses
2/3 cup (116g) dark brown sugar, packed
1/3 cup chopped crystallized ginger
1 teaspoon baking soda
1 tablespoon hot water
1 cup (240ml) buttermilk*
2 eggs
icing sugar, for dusting

Preheat the oven to 180°C/350°F. Butter a 20x30cm (8x12in) baking pan.
In a medium bowl, sift together the flour, ground ginger and salt.
Place the butter, golden syrup, molasses, brown sugar and crystallized ginger in a large saucepan and cook over low heat, stirring, until butter is melted and mixture is smooth. Remove from the heat.
In a teacup, combine the baking soda and the water and add to the saucepan, stirring to combine. Add the buttermilk and eggs and mix to combine. Add the sifted ingredients and stir until smooth. Pour into the prepared pan and bake for 45-50 minutes or until risen and golden and skewer inserted in the center of the cake comes out clean. Cool completely, then dust with icing sugar to serve.

* homemade buttermilk: to make 1 cup buttermilk place 1 tablespoon lemon juice in a 240ml-capacity measuring cup and complete with whole milk (room temperature). Wait 10 minutes for it to thicken slightly, then use the whole mixture in your recipe

Serves 12-15

Tuesday, July 24, 2012

Apple and buttermilk fritters - a delicious excuse to fry

Apple and buttermilk fritters / Bolinhos de chuva de maçã e buttermilk

It’s no secret how much I love Gourmet Traveller – I have made tons of recipes from the magazine and they turned out delicious. I always have several recipes from the magazine on my radar (me and my never ending list) and now, because of the fall, I’ve been targeting the ones with apples and pears, and I intend to make the doughnuts filled with quince jelly as soon as I get my hands on some quince; while that doesn’t happen, I enjoy these apple fritters, which are delicious and very easy to put together – I don’t usually fry food at home, but these are the perfect excuse for it. :)

Apple and buttermilk fritters
from the always gorgeous Australian Gourmet Traveller

Fritters:
1 ¾ cups + ½ tablespoon (250g) all purpose flour
1½ teaspoons baking powder
1 teaspoon ground cinnamon
¼ cup (50g) granulated sugar
finely grated zest of 1 lemon
1 cup (240ml) buttermilk*
2 eggs, separated
2 Granny Smith apples, coarsely grated
vegetable oil, for deep-frying
pinch of salt

Cinnamon sugar:
1 cup (200g) granulated or caster (superfine) sugar
1 teaspoon ground cinnamon

In a large bowl, sift together the flour, baking powder and cinnamon. Stir in the sugar and lemon zest and make a well in the centre. Add buttermilk, yolks and vanilla, stir until smooth, stir in apple. Set aside to rest at room temperature for 30 minutes.
Meanwhile, for cinnamon sugar, combine ingredients in a bowl, then spread on a tray and set aside.
Preheat oil in a deep-fryer or deep-sided small saucepan to 180°C/350°F.
Whisk egg whites and salt in a bowl until firm peaks form. Fold one-third of egg white into apple mixture to lighten, then fold in remaining egg white. Spoon rough quenelles of mixture into hot oil, in batches, and cook, turning occasionally, until golden and cooked through (2-3 minutes; be careful as hot oil may spit). Drain in paper towels, toss in cinnamon sugar and serve hot.

* homemade buttermilk: to make 1 cup buttermilk place 1 tablespoon lemon juice in a 240ml-capacity measuring cup and complete with whole milk (room temperature). Wait 10 minutes for it to thicken slightly, then use the whole mixture in your recipe

Makes about 40

Sunday, July 22, 2012

Chocolate peanut butter cheesecake bars + "Man of Steel"

Chocolate peanut butter cheesecake squares / Quadradinhos de cheesecake de manteiga de amendoim e chocolate

I've just had a delightful surprise during my daily visit to "Awards Daily": the lovely Sasha Stone posted not one, but two versions of the "Man of Steel" teaser, one voiced over by Kevin Costner (Jonathan Kent) and the other by the always amazing Russel Crowe, who will be playing Jor-El - if that isn't reason enough to anxiously wait for that movie I do not know what is. :)

The beautiful teaser comes with some cheesecake, a delicious peanut butter version by the always amazing Nigella Lawson.
To me, the chocolate glaze was unnecessary on the dulce de leche cheesecake bars I made a while ago, but here it’s perfect: the peanut butter has a slightly salty flavor and the milk chocolate compliments it beautifully.

Chocolate peanut butter cheesecake bars
adapted from the magnificent Nigella Kitchen: Recipes from the Heart of the Home

Base:
140g digestive biscuits
2 ½ tablespoons (35g) unsalted butter, softened

Filling:
300g cream cheese
2 eggs
2 egg yolks
2/3 cup (133g) granulated sugar
1/3 cup (80ml) sour cream*
2/3 cup smooth peanut butter

Topping:
2/3 cup (160ml) sour cream
2/3 cup (120g) milk chocolate chips
1 ½ tablespoons brown sugar

Preheat the oven to 160°C/325°F. Lightly butter a 20cm (8in) square baking pan then line the bottom and sides with 2 pieces of foil, leaving a 5cm (2in) overhang on two opposite sides. Butter the foil as well.
Base: process the biscuits until ground then add the butter; process again until mixture resembles wet sand. Turn it out into the prepared pan and press into the bottom to make the crust. Put in the fridge while you make the filling.
Filing: place the cream cheese, eggs, egg yolks, sugar, sour cream, peanut butter and vanilla in the clean bowl of the food processor and process until very smooth. Pour into the base bake for 1 hour, though check after 50 minutes: the top – only – should feel set and dry.
Take the cheesecake out of the oven while you make the topping.
Warm the sour cream and chocolate with the brown sugar gently in a small saucepan over a low heat, whisking to blend in the chocolate as it melts, and then take off the heat. Spoon and spread the topping very gently over the top of the cheesecake, then put it back in the oven for a final 10 minutes**.
Once out of the oven, let the cheesecake cool completely in the pan over a wire rack, then cover and refrigerate overnight.
Carefully lift cheesecake from pan using foil overhangs and cut into 16 squares.

* homemade sour cream: to make 1 cup of sour cream, mix 1 cup (240ml) heavy cream with 2-3 teaspoons lemon juice in a bowl. Whisk until it starts to thicken. Cover with plastic wrap and leave at room temperature for 1 hour or until thicker (I usually leave mine on the counter overnight – except on very warm nights – and it turns out thick and silky in the following morning; refrigerate for a creamier texture)

** mine looked exactly the same after 10 minutes, so I baked it for 22 (until matte and firmer)

Makes 16

Friday, July 20, 2012

Lemon angel food cake with lemon glaze and pistachios

Lemon angel food cake with lemon glaze and pistachios / Bolo de claras e limão siciliano com calda de limão siciliano e pistache

This recipe should come with a warning: besides being delicious - no surprise here since we're talking about a lemon cake - its texture is so light, so feathery, that without noticing you'll be going back to the kitchen for seconds, thirds... (yes, I am writing from experience). :)

If you don't have pistachios on hand I am sure that almonds would work wonderfully here, too.

Lemon angel food cake with lemon glaze and pistachios
slightly adapted from Bon Appétit

Cake:
1 cup (120g) cake flour (homemade: 100g all purpose flour + 20g corn starch)
1 cup (200g) granulated sugar, divided
1/8 teaspoon salt
10 large egg whites (280g), room temperature
finely grated zest of 2 large lemons
1 teaspoon vanilla extract
1 teaspoon cream of tartar

Lemon syrup and glaze:
½ cup (100g) granulated sugar
4 tablespoons fresh lemon juice, divided
½ cup (65g) unsalted pistachios, lightly toasted and cooled, finely chopped
½ cup (70g) powdered sugar

For cake: position rack in center of oven and preheat to 180°C/350°F. Have ready a 25cm (10in) diameter angel food cake pan with 10cm (4in) high sides and removable bottom (do not use a nonstick pan)*.
Sift flour, ½ cup (100g) sugar and salt into medium bowl; repeat sifting 3 times. Using electric mixer, beat egg whites, lemon zest, and vanilla on medium speed in large bowl until frothy (mixture may turn bright yellow but color will change when remaining ingredients are added). Add cream of tartar; increase speed to high and beat until soft peaks form. Gradually add remaining 1 cup (100g) sugar, 2 tablespoons at a time, beating until stiff peaks form. Sprinkle 1/3 of flour mixture over whites and gently fold in until incorporated. Fold in remaining flour mixture in 2 more additions just until incorporated. Transfer to cake pan and smooth the top.
Bake cake until pale golden and tester inserted near center comes out clean, about 38 minutes. Immediately invert cake onto work surface if pan has feet, or invert center tube of pan onto neck of bottle or metal funnel and cool cake completely.
Using long thin knife, cut around cake sides and center tube to loosen. Lift out center tube with cake still attached; run knife between cake and bottom of pan to loosen. Invert cake onto rack, then turn cake over, rounded side up, onto serving plate.

Lemon syrup and glaze: combine the granulated sugar and 3 tablespoons lemon juice in small saucepan; stir over medium heat until sugar dissolves. Brush syrup all over top and sides of cake. Immediately press pistachios onto top and sides of cake, pressing to adhere.
Stir powdered sugar with remaining 1 tablespoon lemon juice in small bowl until smooth. Drizzle glaze over top of cake. Let stand until glaze sets, about 10 minutes.
Cake can be made up to 1 day ahead – cover with cake dome and store at room temperature.

* I used a nonstick pan because it’s the one I have; the cake did not raise as much as the one on the photo of the original recipe but it tasted delicious and had a very light, feathery texture

Serves 10-12

Wednesday, July 18, 2012

Spinach casserole with orecchiette and cheeses

Spinach casserole with orecchiette and cheeses / Orecchiette de forno com espinafre e queijos

Talking to a coworker who has lost several pounds, I found out that the on the diet she’s been on gluten and dairy are forbidden. I must say that as much as I would love to lose a couple of pounds, I would never be able to follow that kind of diet: I cannot survive without bread and cheese; I know there are ways of replacing wheat flour for other kinds of flour – the spelt muffins I made a while ago were pretty decent – but the thought alone of not eating cheese makes me moody already. :)

This cheeseaholic loved Amanda Hesser’s pasta dish not only because there are two types of cheese involved, but also because it’s delicious, hearty even without any kind of meat and perfect for the cold days we’ve been having here.

Spinach casserole with orecchiette and cheeses
slightly adapted from Amanda Hesser’s wonderful recipe bible

300g spinach
1 tablespoon olive oil
1 large onion, finely chopped
2 fat garlic cloves, minced
1 ½ cups finely chopped canned plum tomatoes
225g (½ pound) orecchiette
½ cup crumbled goat cheese
1 cup freshly grated Parmesan cheese
salt and freshly ground black pepper

Preheat the oven to 180°C/350°F. Have ready a 6-cup capacity casserole or baking dish.
Rinse the spinach and remove the stems. Gather all the leaves and roll them together like a cigar then finely slice.
Heat the olive oil in a large, heavy skillet. Add the onion, sauté over medium heat until tender but not brown, then stir in the garlic. Add the tomatoes, then add the spinach. Cook for about 5 minutes, until the spinach has wilted.
Meanwhile, bring a large pot of salted water to a boil for the pasta. Cook the orecchiette until al dente. Remove the sauce from the heat, stir in the goat cheese and half the parmesan. Season with salt and pepper.
Drain the pasta and toss with the sauce, then transfer to the casserole. Sprinkle the remaining parmesan on top. Bake for about 15 minutes or until heated through. Serve at once.

Serves 2

Monday, July 16, 2012

Chocolate chip brownie double-deckers

Chocolate chip brownie double deckers / Barrinhas duplas de brownie e cookie com gotas de chocolate

Being someone who always has trouble choosing what to prepare, these double deckers were the perfect solution to my baking conundrum: two different layers, two delicious baked goods in one. To make things even better, the recipe is easy to put together and yields a lot, being great for sharing – they disappeared from the office quite fast the other day... :)

The recipe comes from a cookbook I bought on a day I was feeling bored to my bones and needed a little retail therapy – since I’m not into shoes and bags as apparently all the other girls are (or feel obligated to be as to feel they belong to a certain group of people), I bought a couple of books and Abigail Johnson Dodge’s "The Weekend Baker" turned out to be a very pleasant surprise: I have baked a handful of recipes from it and everything turned out delicious.

Chocolate chip brownie double deckers / Barrinhas duplas de brownie e cookie com gotas de chocolate

Chocolate chip brownie double-deckers
from the delicious The Weekend Baker

Chocolate chip layer:
¾ cup (170g) unsalted butter
1 ¼ cups (218g) firmly packed light brown sugar
1 1/3 cups (187g) all-purpose flour
½ teaspoon baking soda
¼ teaspoon salt
1 large egg
1 teaspoon vanilla extract
1 cup (180g) semi-sweet chocolate chips

Brownie layer:
¾ cup (170g) unsalted butter, chopped
¾ cup (68g) unsweetened Dutch-process cocoa powder, sifted if lumpy
1 ½ cups + 3 tablespoons (336g) granulated sugar
¼ teaspoon salt
2 large eggs
1 ½ teaspoon vanilla extract
¾ cup (105g) all-purpose flour

Position the oven rack in the middle of the oven. Preheat the oven to 160°C/325°F*.
Line a 32x22cm (9x13in) baking pan with foil, leaving an overhang in two opposite sides. Butter the foil.
Chocolate chip layer: in a medium saucepan over medium heat melt the butter. Slide the pan from the heat and add the brown sugar. Whisk until no lumps remain. Set the butter mix aside to cool while making the brownie layer.

Brownie layer: in a medium saucepan over medium heat, melt the butter. Slide the pan from the heat and add the cocoa powder. Whisk until the mixture is smooth. Add the sugar and salt and whisk until blended. Add the eggs, one at a time, whisking after each addition just until blended. Whisk in the vanilla with the second egg. Sprinkle the flour over the chocolate mixture and stir with a rubber spatula just until the ingredients are blended. Scrape the batter into the prepared baking dish and spread it evenly with an offset or rubber spatula. Set it aside while you finish the chocolate chip layer.

To finish the chocolate chip layer: in a small bowl, combine the flour, baking soda and salt. Whisk until it's well-blended. Once the butter mixture has cooled, add the egg and vanilla to it and whisk until blended. Pour in the flour mixture and stir with a rubber spatula until the ingredients are blended. Stir in the chocolate chips.
Drop the dough over the brownie batter in large scoops and spread it evenly with an offset or rubber spatula. Bake until a wooden pick or cake tester inserted in the center comes out with small, gooey clumps of brownie sticking to it, about 40 minutes. Don't over-bake or the brownies won't be fudgy. Transfer the baking pan to a rack to cool completely.

Cut the brownies into small squares measuring about 5cm (2in) each.

* Out of distraction I baked the bars at 180°C/350°F (and they worked out fine)

Makes 24 – I made the exact recipe above using a 20x30cm (8x12in) baking pan; I found the bars really rich, therefore I cut each square in half to make smaller bars

Friday, July 13, 2012

Lemon and cardamom cake + "50/50"

Lemon and cardamom cake / Bolo de limão siciliano com cardamomo

I am always interested in great performances, especially when they’re delivered by actors and actresses I adore; that is the reason why I wanted to watch "50/50": Joseph Gordon-Levitt is absolutely amazing in this movie and Seth Rogen surprised the hell out of me too, I have to admit it.

*spoilers*

Cancer is not a subject I deal very well with and even though the movie made me cry in several moments it didn’t feel heavy, much to the contrary: it has a very optimistic feel. Several scenes made me think of my mom, especially the one when Levitt’s character finds out he has cancer: I can’t imagine what she must have felt hearing the news, being 28 and having two kids at home (my brother was 1 and I was 3). I felt so much sorrow deep inside my heart and thought of stopping watching the movie right then and there, but I’m glad I did not: knowing that on a daily basis people survive this awful disease brings me a sense of joy and hope.

Besides Levitt and Rogen, I loved, loved, loved Anjelica Houston as the mother: she’s not on screen much, but when she is... There is a ton of love and worry and pain coming from her character, which to me is really hard to pull off without going sappy and yet she does it so brilliantly, the way that only amazing actresses can (the green tea scene made me cry like a baby).

I’d never thought a movie about cancer would have such positive effect on me.

* end of spoilers*

I thought that a movie with that kind of connection with things I’ve been through should be paired with my favorite kind of cake: lemon. I had no idea cardamom worked so well with lemon as it does with orange.

Lemon and cardamom cake
slightly adapted from the absolutely wonderful Good Things to Eat (mine was bought here)

1 ¼ cups (175g) all purpose flour
2 ¼ teaspoons baking powder
pinch of salt
175g unsalted butter, softened
¾ cup + 2 tablespoons (175g) demerara sugar
finely grated zest and juice of 2 large lemons
1 teaspoon freshly ground cardamom
3 eggs
1 teaspoon vanilla extract
¼ cup (50g) granulated sugar

Preheat the oven to 180°C/350°F. Butter a 21x10cm (8¼x4in) loaf pan, line it with baking paper and butter the paper as well.
Sift the flour, baking powder and salt into a medium bowl. Set aside.
In the large bowl of an electric mixer, beat butter, demerara sugar, zest and cardamom until light and fluffy, scraping the sides of the bowl occasionally. Beat in the eggs, one at a time – mixture may curdle, do not worry. Beat in the vanilla.
Fold in the sifted ingredients, mixing just until absorbed, then quickly beat in half the lemon juice. Spread the batter into the prepared pan, smooth the top and bake for about 40 minutes or until risen, golden and a skewer inserted in the center of the cake comes out clean.
While the cake is still hot (still inside the pan, over a wire rack), pierce it all over with a toothpick. In a small bowl, mix together the remaining lemon juice with the granulated sugar, without letting it dissolve too much, and spoon over the cake. Cool completely in the pan.

Serves 6-8

Wednesday, July 11, 2012

Salted chocolate caramel tartlets

Salted chocolate caramel tartlets / Tortinhas de chocolate e caramelo salgado

Talk about perfect timing: the fall issue of my favorite food magazine arrived one day after I’d opened a jar of dulce de leche just to eat a spoonful of it (just ONE, guys, I swear). :)
Since I could not eat the remaining contents of that jar – wanted to, but couldn’t – I’d already started thinking of something to make with it; that was when, flipping through the beautiful pages of the magazine, I saw these tartlets – filled with dulce de leche and topped with ganache, they were just what I needed.
I know that not everyone likes salt in their sweets – my sister had her tartlet without salt – so consider it an optional addition.

***

So you don’t think I’ve forgotten about the “The Hunger Games” trilogy: after reading the first two books in a very short period of time, I’ve been procrastinating like hell with “Mockinjay” – is it just me or this book is boooring? :/

Salted chocolate caramel tartlets
slightly adapted from the always wonderful Donna Hay Magazine

Pastry:
1 cup + 1 tablespoon (150g) all purpose flour
½ cup (45g) cocoa
½ cup + 1 tablespoon (78g) icing sugar
pinch of salt
½ cup + 1 tablespoon (127g) unsalted butter, cold and chopped
3 egg yolks
1 teaspoon vanilla extract
1 tablespoon iced water

Filling and topping:
1 cup dulce de leche
1/3 cup (80ml) heavy cream
120g (4oz) dark chocolate chopped
sea salt flakes, for sprinkling – I used Maldon

Start with the pastry: place the flour, cocoa, icing sugar, salt in a food processor and blitz to combine. Add the butter and pulse until mixture resembles fine breadcrumbs. With the motor running, add the egg yolks and vanilla, then the iced water and process just until a dough starts to form. Transfer to a large piece of plastic wrap and bring the dough together with the tips of your fingers. Shape into a disk and wrap in the plastic. Refrigerate for 2 hours or overnight.
Lightly butter six 8cm tartlet pans. Divide the pastry into 6 parts. Between two pieces of lightly floured baking paper roll each piece of pastry into a rough circle then line the pans, removing the excess pastry. Prick the pastry with a fork then freeze for 30 minutes. Preheat the oven to 180°C/350°F.
Butter the shiny side of a piece of aluminum foil (or use nonstick foil) and cut roughly into six squares; place the foil squares, buttered side down, tightly against the crust. And here is the very best part: Since you froze the crust, you can bake it without weights. Bake for 10-12 minutes, then carefully peel off the foil. If the crust has puffed, press it down gently with the back of a spoon. Bake the crusts for 10-15 minutes longer or until cooked through. Cool completely in the pans.
Divide the dulce de leche between the pastry cases and, using the back of a spoon, spread evenly. Refrigerate for 30 minutes.
Place the cream in a small saucepan over high heat and bring to a boil. Remove from the heat, add the chocolate and stir until smooth and glossy. Spread the tartlets with the ganache and refrigerate for 2 hours or until set. Sprinkle with salt to serve.

Makes 6 – I made the exact recipe above, used 9cm (3½in) tartlet pans and got 10 tartlets; I first divided the pastry in 8 parts, then rerolled the scraps once to get two more tartlets

Monday, July 9, 2012

Blackcurrant-sour cream coffee cake

Blackcurrant sour cream coffee cake / Bolo de creme azedo e geléia de cassis

I have just watched "The Amazing Spider-Man" and even though I think that the "amazing" of that title is a bit too presumptuous I liked the movie: it's a really good cast, far better than the first Spider-Man movie directed by Sam Raimi. But Raimi had Willem Dafoe as the villain, and Willem Dafoe as the villain is just perfection; actually, Dafoe as anything is perfection. :)
In a perfect world, Andrew Garfield's Spider-Man would be directed by Sam Raimi.

Well, the world is not perfect but this cake is: the batter is delicious and the sour cream makes the cake extremely tender; I used blackcurrant preserves here because I'd bought a jar of it on a whim but any flavor will do: use your favorite.

Blackcurrant-sour cream coffee cake
slightly adapted from the wonderful Food & Wine

2 cups (280g) all-purpose flour
1 tablespoon baking powder
½ teaspoon salt
1 cup (2 sticks/226g) unsalted butter, softened
1 ½ cups (300g) granulated sugar
2 large eggs, room temperature
1 cup sour cream*
1 tablespoon pure vanilla extract
¾ cup blackcurrant preserves
confectioners' sugar, for dusting

Preheat the oven to 180°C/350°F. Butter and flour a 25cm (10in) Bundt pan.
In a medium bowl, whisk together the flour, baking powder and salt. In a large bowl, beat the butter until creamy. Add the granulated sugar and beat until light and fluffy. Beat in the eggs, one at a time, beating well after each addition and scraping the sides of the bowl. Add the sour cream and vanilla. On low speed, beat in the dry ingredients just until incorporated – batter will be thick.
Spread all but ½ cup of the batter into the prepared pan. Using the back of a spoon, make a trough in the batter, all the way around the pan. Mix the preserves with the reserved batter and spoon it into the trough.
Bake the cake for about 1 hour, or until it begins to pull away from the pan and a skewer inserted in the center comes out clean. Let the cake cool in the pan for 15 minutes. Invert the cake onto a wire rack, remove the pan and let cool completely.
Sift with the confectioners' sugar and serve.

* homemade sour cream: to make 1 cup of sour cream, mix 1 cup (240ml) heavy cream with 2-3 teaspoons lemon juice in a bowl. Whisk until it starts to thicken. Cover with plastic wrap and leave at room temperature for 1 hour or until thicker (I usually leave mine on the counter overnight – except on very warm nights – and it turns out thick and silky in the following morning; refrigerate for a creamier texture)

Serves 8-10

Friday, July 6, 2012

Easy double choc brownies make happy coworkers

Easy double choc brownies / Brownies fáceis com chocolate branco

My idea was to bring brownies to work but had so much to do I was running out of time to actually bake them – that was when I turned to the cookbook for all things sweet, which I have baked very delicious things from. When I’m pressed for time and can’t go to Eat Your Books or flip through my cookbooks I go straight to Bon Appétit Desserts and up until now I have been extremely happy with that.

These brownies are easy, the recipe calls for simple ingredients that are mixed in one saucepan and you can even make them without the white chocolate – that was something I added to jazz the brownies up a little. Totally optional – and a hit with the coworkers.

Easy double choc brownies
slightly adapted from the magnificent Bon Appetit Desserts: The Cookbook for All Things Sweet and Wonderful

140g (5oz) dark chocolate, chopped – I used one with 53% cocoa solids
½ cup (113g/1 stick) unsalted butter, diced
2 cups (400g) granulated sugar
2 teaspoons vanilla extract
4 large eggs
¼ teaspoon salt
1 cup (140g) all purpose flour
1 ¼ cups (230g) white chocolate chips

Preheat oven to 180°C/350°F. Line a 32x22x5cm* (13x9x2in) metal baking pan with foil, leaving overhang. Butter the foil.
Stir dark chocolate and butter in heavy large saucepan over low heat until melted and smooth. Cool 15 minutes. Whisk in sugar and vanilla, then whisk in eggs and salt; stir in flour just until absorbed. Stir in the white chocolate chips. Spread batter in prepared pan.
Bake brownies until tester inserted into center comes out with moist crumbs attached, about 20 minutes. Cool in pan.
Cut into bars and serve.

* I made the exact recipe above using a 20x30cm (8x12in) pan

Makes 20

Wednesday, July 4, 2012

Orange cardamom pound cake with candied orange peel + a question

Orange cardamom pound cake with candied orange peel / Bolo de laranja e cardamomo com casca de laranja em calda

I made this cake months ago but waited until now to publish it to avoid bothering you with my too-much-candied-orange-peel drama. The recipe was a simple orange cake – which is something I love – spiced with a bit of cardamom – which is something I’ve learned to love – and I just added the bits of candied peel because I no longer wanted to look at them every time I opened my fridge. So it is completely up to you to decide how you want to bake this cake – I just urge you to do it, because it is delicious and oh, so tender.

And speaking of pound cakes, I’m looking for a good 9x5in loaf pan and would love to know there’s a brand you would recommend; I’ve browsed some at Amazon but haven’t chosen yet – your opinion would be very useful to me. Thanks!

Orange cardamom pound cake with candied orange peel / Bolo de laranja e cardamomo com casca de laranja em calda

Orange cardamom pound cake with candied orange peel
slightly adapted from the great The Art and Soul of Baking

Cake:
2 cups (240g) cake flour*
½ teaspoon baking powder
1/8 teaspoon salt
¾ cup (150g) granulated sugar
¾ cup (1½ sticks/170g) unsalted butter, softened
finely grated zest of 1 orange
1 teaspoon ground cardamom
3 large eggs, room temperature
1 teaspoon pure vanilla extract
1/3 cup sour cream**
1/3 cup drained and chopped candied orange peel (optional – recipe here)

Glaze:
1 cup (140g) confectioners’ sugar
½ to 1 tablespoon orange juice, or more if necessary

Preheat the oven to 180°C/350°F and position an oven rack in the center. Butter a 21x11cm (8½x4½ in) loaf pan and line with baking paper; butter the paper as well.
In a medium bowl, sift together the flour, baking powder and salt.
In the large bowl of an electric mixer, cream the butter, sugar, zest and cardamom until light and fluffy. Scrape down the bowl with the spatula.
Add the eggs, one at a time, beating well after each addition. Beat in the vanilla. Scrape the bowl occasionally. On low speed, add the sifted ingredients in three additions alternating with the sour cream in two additions (begin and end with the dry ingredients). Stir in the candied orange zest (if using). Transfer batter to prepared pan, smooth the top then bake for 45-55 minutes, until firm to touch and a toothpick inserted into the center comes out clean. Transfer to a rack to cool completely. When cool, remove from the pan and peel off the paper.

Glaze: sift the confectioners’ sugar into a small bowl and gradually add the orange juice, stirring until desired consistency. Pour over the cooled cake. Set aside for 30 minutes before serving.

* homemade cake flour: 1 cup (140g) all purpose flour minus 2 tablespoons + 2 tablespoons corn starch

** homemade sour cream: to make 1 cup of sour cream, mix 1 cup (240ml) heavy cream with 2-3 teaspoons lemon juice in a bowl. Whisk until it starts to thicken. Cover with plastic wrap and leave at room temperature for 1 hour or until thicker (I usually leave mine on the counter overnight – except on very warm nights – and it turns out thick and silky in the following morning; refrigerate for a creamier texture)

Serves 6-8

Monday, July 2, 2012

Apple and cinnamon tarte fines

Apple and cinnamon tarte fines / Torta folhada de maçã e canela

I’m not a very huge fan of animated movies but I do have a few favorites: “Finding Nemo”, “Mulan”, “Spirited Away” and “Kung Fu Panda” – the hubby loves the latter, too, and last night we watched "Kung Fu Panda 2" together. I have to say that choosing Jack Black and Dustin Hoffman as the voices of Po and Shifu was a really bright idea – they’re perfect for the roles. And my favorite actor is so complete and talented that he kicks ass even as a cartoon. :D
Even thought the hubby and I thought the first movie was better, we both enjoyed “Kung Fu Panda 2” a lot, and at the end of the movie Joao looked at me and smiled: I was crying like a baby. :D

***
This tart, though simple and with 5 ingredients only, was a huge success with my sisters-in-law: they loved it. This is more an assembling job than a recipe, but due to the nice comments I got for it I decided to share it with you.

Apple and cinnamon tarte fines
from the always delicious and gorgeous Australian Gourmet Traveller

350g puff pastry sheet
2 small Granny Smith apples, unpeeled
3 tablespoons granulated sugar
1 teaspoon ground cinnamon
1 ½ tablespoons unsalted butter

Preheat oven to 220°C/428°F and place a baking sheet in the oven while it’s heating.
Trim pastry to a 23x25cm (9x10in) rectangle, place on a piece of baking paper (I used foil) and prick all over with a fork.
Thinly slice apples on a mandolin to 2mm thick and arrange over pastry, overlapping slices and leaving a 5mm border. Combine sugar and cinnamon in a bowl, scatter half over apples. Dot apples with half the butter, then transfer pastry and baking paper to heated oven tray and bake on top shelf of oven until pastry begins to brown, 8-10 minutes. Scatter with remaining cinnamon sugar, dot with remaining butter and bake until apples are tender and browned on edges and pastry is dark golden and crisp, 10-15 minutes.
Cool slightly on the sheet over a wire rack for 5 minutes, then transfer the paper with the tart to the rack. Serve warm with whipped cream or vanilla ice cream.

Serves 6

Related Posts with Thumbnails